One or more segments and/or rollups are assigned to a rollup. Each rollup contains one or more rollup items which in turn are defined by the segment items and/or rollup items or combinations they include. Rollup items typically represent lines on a financial statement. When you create rollups, try to combine the fewest number of segments and/or rollups possible.
Rollup assignments can be made in a couple of ways. You can directly assign a rollup on accounts, segments, or rollups. Or you can create rules to define which segments and/or rollups belong to a rollup. Rules-based rollups are especially suited to sites with a well-structured chart of accounts. Assignment-based rollups provide more fine-grained control and are useful for less-structured charts of accounts.
- In the Navigation pane, highlight the ActivReporter > Setup > Rollups folder.
- Click
 . The New Rollup window opens.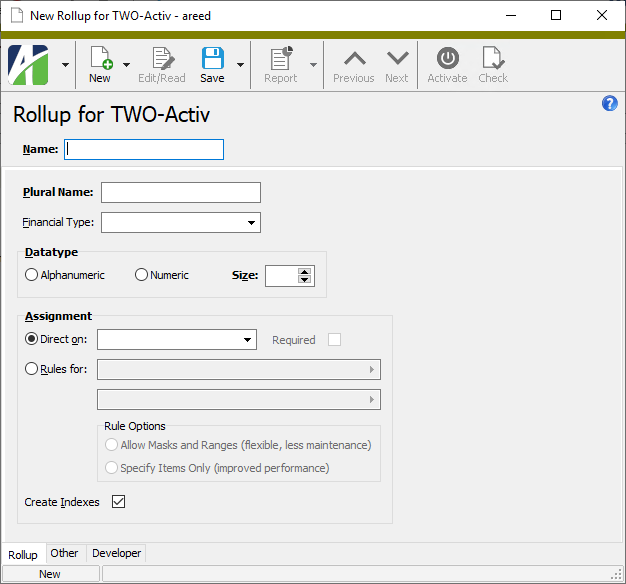
-
Enter a unique Name for the rollup. You can use up to 20 characters.
Note
While spaces are allowed in rollup names, AccountingWare does not recommend it due to the complexities it introduces to designing financial statements.
- Enter the Plural Name for the rollup. The plural name is used as the label for the rollup's folder in the navigation tree.
- From the Financial Type drop-down list, select the type of financial to which the rollup applies. The financial type is used in conjunction with the AcctType rollup to assess the health of rollups. Valid options are:
- <blank>
- Balance Sheet
- Income Statement
- Select the Data Type to allow for rollup items. Your options are:
- In the Size field, enter the maximum length for rollup item codes. Valid values are between 1 and 12.
- In the Assignment section, select how to define rollups. Your options are:
- Direct on. If you select this option, rollups are defined by direct assignment on the account, segment, or rollup. Rollup item references can be edited directly. From the drop-down list, select "Account", a segment name, or a rollup name.
Rules for. If you select this option, rollups are defined the "traditional way" using assignment rules. Assignment rules determine which accounts an item is assigned to. Click in the Rules for field to open the Assigned Segments and Rollups dialog.
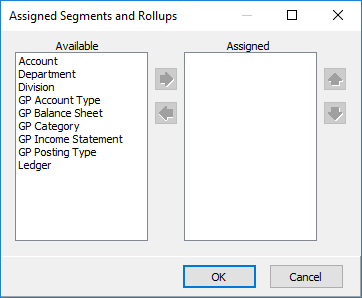
To select segments and/or rollups for assignment:
- In the Available list box, highlight the segments and/or rollups to assign to this rollup, then click
 to move your selections to the Assigned list box. You can use Ctrl and/or Shift selection to select multiple segments and/or rollups.
 - If you assigned multiple segments and/or rollups and need to change their order, use
 and
and  to arrange them in the desired order.
- If you selected "Rules for" in the Assignment section, the Rule Options field is enabled. Select how to formulate assignment rules. Your options are:
- Allow Masks and Ranges. As indicated, this method is flexible and requires less maintenance since as new accounts are added, they are automatically included in the rollup if they match the mask or fall in the specified range.
- Specify Items Only. While specifying items for a rollup explicitly requires you to list all valid combinations of items and to keep the list up-to-date, the benefit is better performance.
- The Create Indexes checkbox is marked by default. When marked, indexes are automatically created on database columns for rollups either at the account level or the journal detail level. Using this option has the potential to dramatically improve performance for queries which limit by those values. If you do not want indexes created automatically or have not experienced performance issues, clear the checkbox.
- Save the new rollup.
Before you activate a rollup, you can check it for ambiguity.
- In the Navigation pane, highlight the ActivReporter > Setup > Rollups folder.
- In the HD view, locate and highlight the rollup you want to check. You can only check inactive rollups.
- Click
 . ActivReporter notifies you of the result.
-
If no ambiguities are found, you are notified that no ambiguities were detected. Click OK to close the message. You now can activate the rollup if desired.
If ambiguities are found, the Rollup Items Ambiguous Check dialog opens. Use the dialog to resolve conflicts in the rollup item rules.
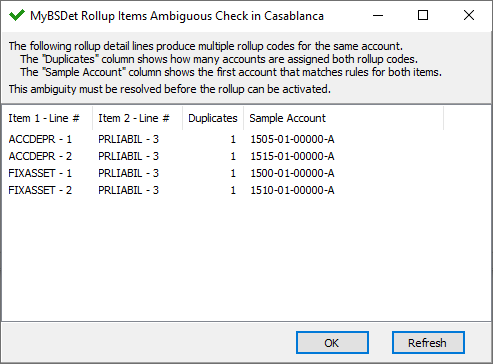
Each row in the Rollup Items Ambiguous Check dialog shows the rollup items and corresponding detail lines which are in conflict, along with the number of duplicate accounts (i.e., accounts in both rollups), and the first account number affected by the conflict.
To resolve a conflict:
-
Double-click the rollup item in the Item 1 - Line # column.
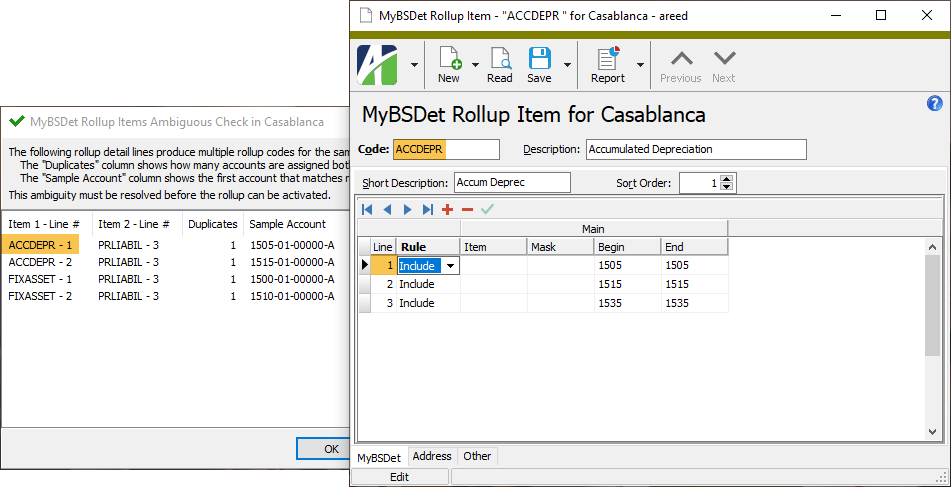
Notice that the Rollup Item window opens with the corresponding rollup item loaded and with focus on the problematic detail line.
-
Repeat step 1 for the rollup item in the Item 2 - Line # column.
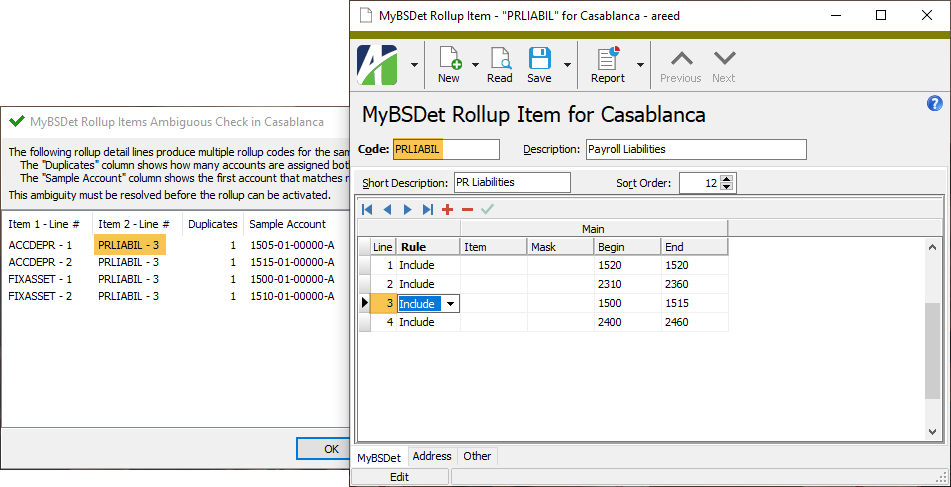
- Inspect the rollup items and determine the necessary corrections.
- Correct the errant rollup item(s) and then save and close them.
- Back in the Rollup Items Ambiguous Check dialog, click Refresh. Any conflicts which were corrected by your actions are removed from the dialog.
- If conflicts remain in the list, repeat steps 1-5 until all are resolved.
- When the last conflict is resolved, ActivReporter notifies you that there are no more ambiguities. Click OK to close the message.
- Click OK to close the Rollup Items Ambiguous Check dialog.
A few things to keep in mind when activating a rollup:
To activate a rollup:
- In the Navigation pane, highlight the ActivReporter > Setup > Rollups folder.
- In the HD view, highlight the inactive rollup to activate.
- Click
 . ActivReporter prompts you to confirm activation.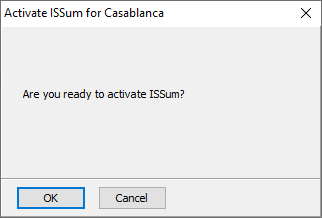
- Click OK. ActivReporter activates the rollup.
Deactivating a rollup is an alternative to deleting it. You must deactivate a rollup to delete it, but deletion is not necessary.
Keep in mind that a rollup cannot be deactivated if it is currently rolled up by an active rollup.
To deactivate a rollup:
- In the Navigation pane, highlight the ActivReporter > Setup > Rollups folder.
- In the HD view, highlight the active rollup to deactivate.
- Click
 . ActivReporter advises you which rollup you are deactivating and prompts you to confirm the action.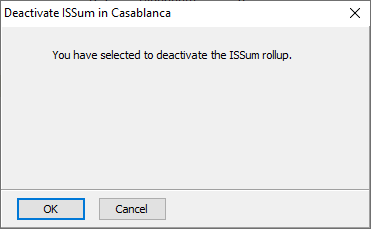
- Click OK. ActivReporter deactivates the rollup.
Resizing user-defined rollup items is part of the tremendous flexibility of ActivReporter. Instead of deleting the rollup that needs its rollup items resized and creating a new rollup, you can simply increase or decrease the size of the rollup items.
To resize rollup items for a rollup:
- In the Navigation pane, highlight the ActivReporter > Setup > Rollups folder.
- In the HD view, highlight the user-defined rollup to resize rollup items for.
- Click
 . The Resize Rollup Items pop-up window opens.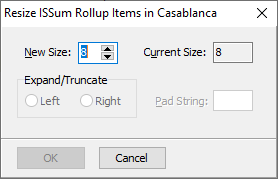
- In the New Size field, enter the new length for the rollup items.
- If you are increasing the size of the rollup items, the next field is labeled "Expand On". If you are decreasing the size, the field is labeled "Truncate On". Select the side of the field to expand or truncate. Your options are:
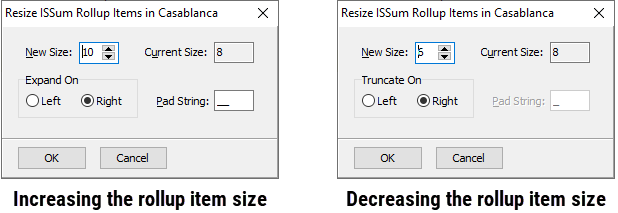
- If you are increasing the rollup item size, the Pad String field is enabled. Enter the number(s), alphabetic character(s), or space(s) to use in the pad string. Enter one character per new position in the rollup. If you leave this field blank, 0 will be used.
- Click OK to resize the rollup items.
Note
You cannot delete a built-in rollup, an active rollup, or a rollup that is currently rolled up.
Tip
Rather than deleting a rollup, consider deactivating it.
- If the rollup is currently active, deactivate it.
- In the Navigation pane, highlight the ActivReporter > Setup > Rollups folder.
- In the HD view, select the inactive rollup to delete.
- In the toolbar, click
 . ActivReporter prompts you to confirm that you want to delete the rollup.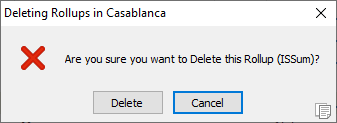
-
Click Delete.
If the rollup has no rollup items and no references, ActivReporter deletes the rollup.
If, on the other hand, the rollup has rollup items, ActivReporter warns you that deleting the rollup will result in rollup items being deleted as well. As Jedi master Yoda would say, "Do. Or do not. There is no try."
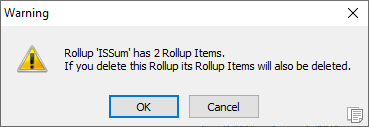
If you want to delete the rollup despite the consequences, click OK.
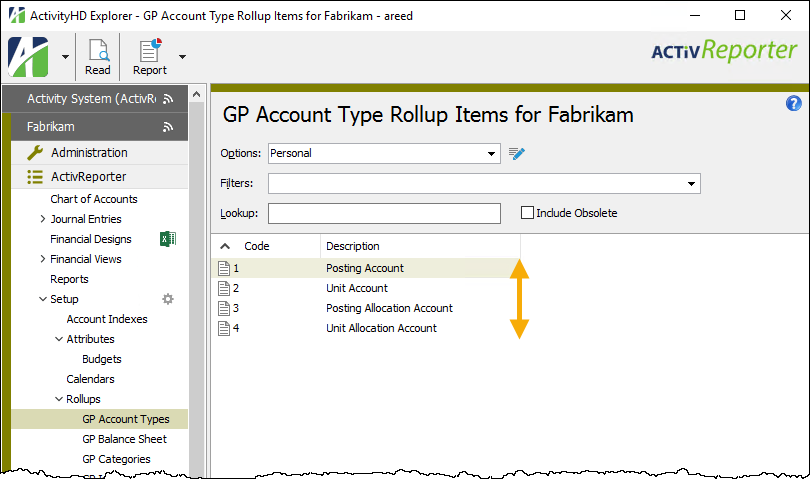
ActivReporter includes five built-in rollups to simplify the financial design process:
- GP Account Type. Contains a rollup item for each Dynamics GP category with an account type of posting account or unit account.
- GP Balance Sheet. Contains a rollup item for each Dynamics GP category assigned to an account with a Dynamics GP posting type of "0" (Balance Sheet).
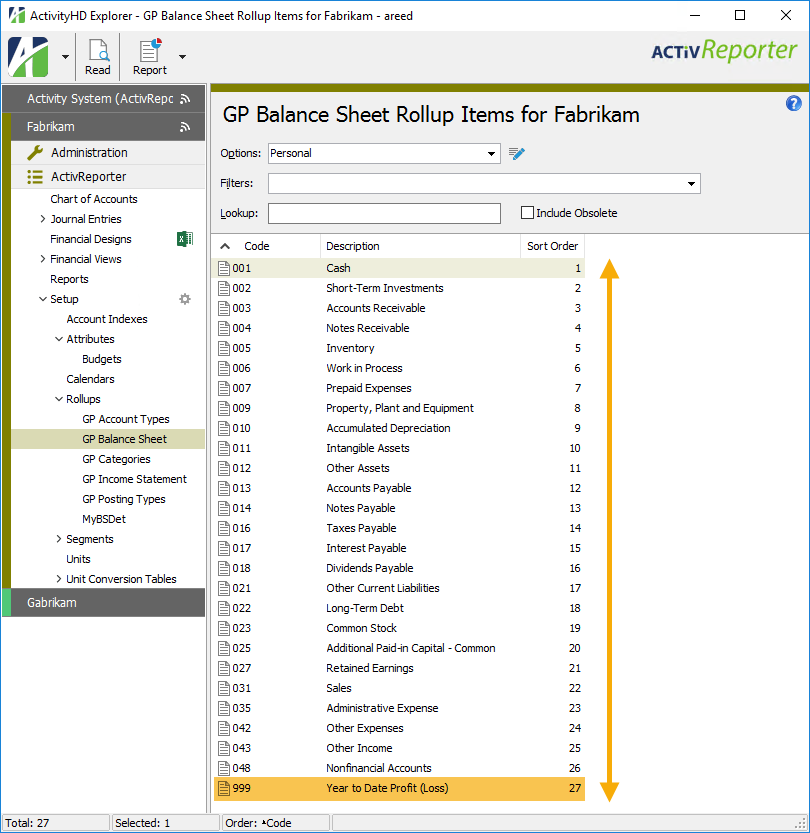
Each item code is a three-digit code which represents the Dynamics GP category being rolled up. Item "999" is a special item code which rolls up all Dynamics GP categories assigned to accounts with a posting type of "1" (Income Statement). Except for code "999", the items for the rollup contain a single detail row which references the corresponding Dynamics GP category item and posting type "0" (Balance Sheet).
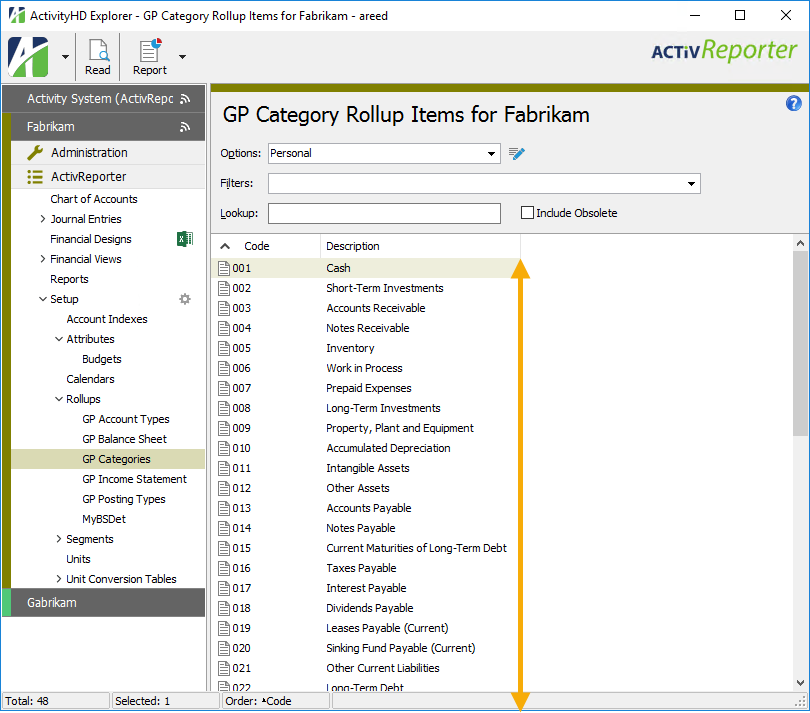
- GP Category. Contains a rollup item for each Dynamics GP category.
- GP Income Statement. Contains a rollup item for each Dynamics GP category assigned to an account with a Dynamics GP posting type of "1" (Profit and Loss).
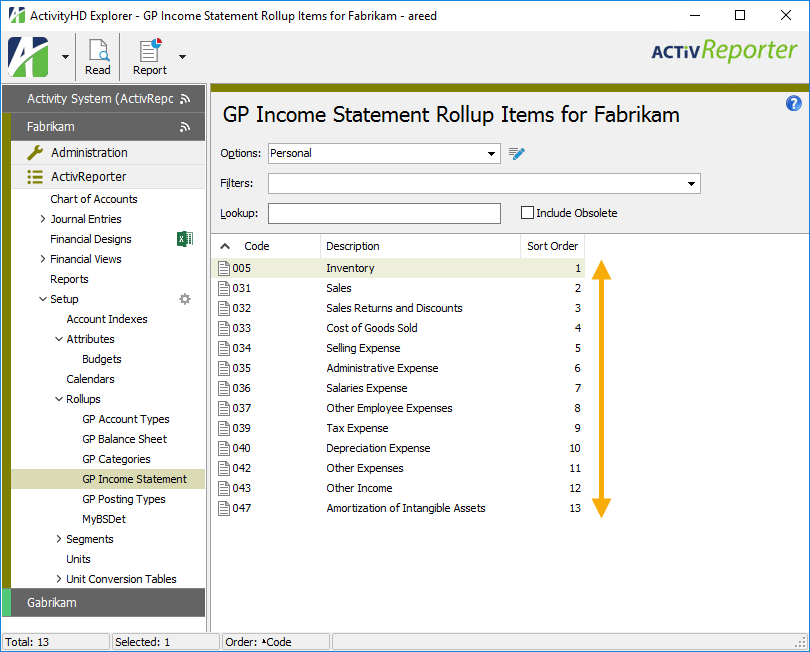
All items for the rollup contain a single detail row which references the corresponding Dynamics GP category item and posting type "1" (Income Statement).
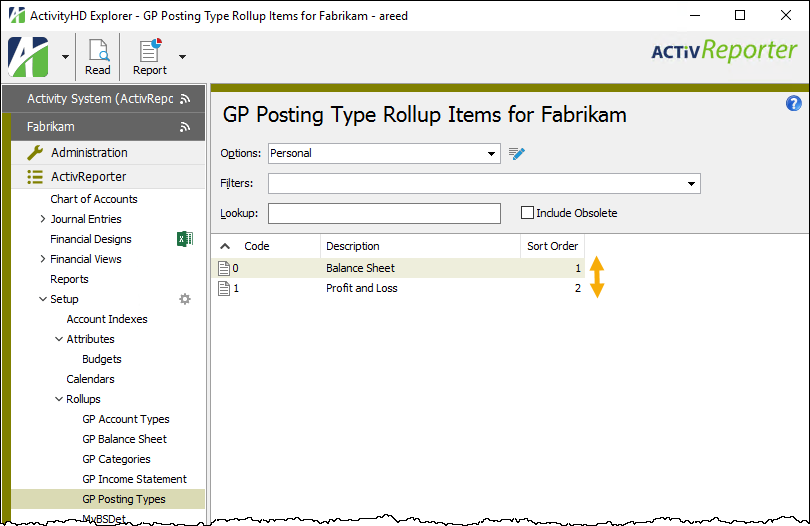
- GP Posting Type. Contains a rollup item for each Dynamics GP posting type: "0" (Balance Sheet) or "1" (Profit and Loss).
Errors can occur when a new account is created which causes a rollup to be ambiguous. ActivSync automatically deactivates ambiguous rollups as well as financial views and account indexes which refer to ambiguous rollups. To proceed, resolve the ambiguity and then reactivate the rollup.
You can use the built-in New Rollup from MR Rows bot to transform Management Reporter row definitions into ActivReporter rollups.
- In the Navigation pane, highlight the ActivReporter > Setup > Rollups folder.
- In the toolbar, click
 and select New Rollup from MR Rows. The bot dialog opens.
- Click OK. You are prompted for your login credentials.
Note
Use either SQL Server credentials or Windows Authentication. Windows Authentication requires the user to have a login to the Management Reporter database; SQL Server login does not.
- Enter your credentials and click OK. A dialog listing your Management Reporter row definitions for the current company opens.
- In the text box, enter the number of the row definition to transform.
Tip
If there are multiple "pages" of row definitions, enter "N" in the text box to see the next page of row definitions.
To see row definitions for all companies, enter "S".
- Once you select the row definition, click OK. You are prompted for a name for the new rollup. The default suggestion is the name of the Management Reporter row definition.
- After you provide a name for the rollup, click OK. The bot runs, creates the new rollup, and reports the results.
- Review the results, then click Next >> to view the new rollup.
- After you view the new rollup, click Finish.
- In the Rollups HD view, highlight the new rollup and click to activate the rollup.
- When prompted to activate the rollup, click OK.
The rollup is now ready for use in financial designs.
Rollup Record ID
Name
A unique name for the rollup.
Note
While spaces are allowed in rollup names, AccountingWare discourages this practice because it introduces avoidable complexity when designing financials.
Rollup tab
Plural Name
The plural form of the rollup's name. The plural name is used as the label for the rollup's folder in the navigation tree.
Financial Type
The type of financial to which the rollup applies. The financial type is used in conjunction with the AcctType rollup to assess the health of rollups. Valid options are:
- <blank>
- Balance Sheet
- Income Statement
Data Type
Select the type of data to allow for rollup items. Your options are:
Size
Select the maximum length in characters for rollup item codes. Valid lengths are 1-12 characters.
Assignment
The option selected here determines how the rollup is defined. Valid options are:
Rule Options
This field is enabled if you selected "Rules for" in the Assignment section. The selection in this field indicates how assignment rules are formulated. Valid options are:
- Allow Masks and Ranges. As indicated, this method is flexible and requires less maintenance. This is because as new accounts are added they are automatically included in the rollup if they match the mask or fall in the specified range.
- Specify Items Only. While specifying items for a rollup explicitly requires you to list all valid combinations of items and to keep the list up-to-date, the benefit is better performance.
Create Indexes
This checkbox is marked by default. When marked, indexes are automatically created on database columns for rollups either at the account level or the journal detail level. Using this option has the potential to dramatically improve performance for queries which limit by those values. If you do not want indexes created automatically or have not experienced performance issues, clear the checkbox.
Custom tab
This tab is visible if custom fields exist for the entity. At a minimum, if there are custom fields, a Fields subtab will be present. One or more additional categories of subtabs may also be visible.
Fields subtab
This tab prompts for values for any custom fields set up for entity records of this entity type. Respond to the prompts as appropriate.
References subtab
This tab is visible if other records reference the current record.
Reference
From the drop-down list, select the custom field to view references for. Reference custom fields have the following format: PackageName.EntityName.CustomFieldName.
Exchange Folder subtab
This tab is visible only if you set up a custom field with a data type of "Exchange Folder". The label on this tab is the name assigned to the custom field.
This tab shows the contents of the specified Exchange folder.
File subtab
This tab is visible only if you set up a custom field with a data type of "File". The label on the tab is the name assigned to the custom field.
This tab renders the contents of the specified file according to its file type.
Internet Address subtab
This tab is visible only if you set up a custom field with a data type of "Internet Address". The label on this tab is the name assigned to the custom field.
This tab shows the contents of the specified web page.
Network Folder subtab
This tab is visible only if you set up a custom field with a data type of "Network Folder". The label on this tab is the name assigned to the custom field.
This tab shows the contents of the specified network folder.
[Rollup Name] tab
The [Rollup Name] pane shows the [Rollup Name] Rollup Items HD view showing all rollup items for the selected rollup.
Double-click a row in the pane to drill down to its record in the [Rollup Name] Rollup Item window.
The Attachments tab is visible if any record for a given entity has an attachment. If the Attachments tab is not visible, this implies that no record of the entity type has an attachment on it; however, once an attachment is added to any record of the entity type, the Attachments tab will become available.
Attachments
The list box shows the files which are attached to the current record. Highlight a file name to preview the file in the adjacent pane. Double-click a file name to open the file in its native editor.
Preview pane
If a file name is highlighted in the Attachments list box, this pane shows a preview of the file contents. Some file types cannot be previewed but can be double-clicked to open in their native editor.
Change Logs tab
This tab is visible if the user has "Change Logs" access to the associated data folder resource.
The Change Logs pane shows the Change Logs HD view filtered to show all change logs for the selected entity record.
Double-click a row in the pane to drill down to its record in the Change Log window.
Other tab
Memo tab
To include additional information about this record not collected elsewhere, enter it in this text box. This area supports common keyboard shortcuts such as Ctrl+C to copy and Ctrl+V to paste.
Timestamps tab
This tab shows the user who created this record and the date and time of creation as well as the user, date, and time of the latest modification to the record.
Note
For entries coming from Dynamics-GP, the dates are the date and time of the last seeding/syncing.
Developer tab
This tab is visible only when developer features are enabled.
Automation subtab
This subtab shows field names and values for the current data record. Use the information in the subtab to assist when creating automation objects such as bots and import files. The field names and field values can be copied from the text box and pasted directly into your code or application. To copy content from the text box, highlight the content to copy and press Ctrl+C or right-click your selection and select Copy from the context menu.
Export (XML) subtab
This subtab shows the XML syntax for exporting the selected data record. The syntax can be copied from the text box as an exemplar for creating your own automation objects for bots, import files, ActivWebAPI, etc. To copy content from the text box, highlight the content to copy and press Ctrl+C or right-click your selection and select Copy from the context menu.
Import (XML) subtab
This subtab allows you to select a file for import and shows the XML syntax for importing data records. Use the subtab to explore the XML syntax for importing data records. In particular, you can investigate the syntax which results when using Data.Import and ActivWebAPI data POST and DELETE routes.
Change Log (XML) subtab
This subtab is visible only when the Enable Change Logs option is marked in System Options or Company Options (depending on whether the feature applies at the system or the company level). This is the default setting when developer features are enabled.
This subtab allows you to investigate changes to the current data record. The syntax can be copied for use in bots, dashboards, ActivWebAPI, and other automation. To copy content from the text box, highlight the content to copy and press Ctrl+C or right-click your selection and select Copy from the context menu.
Select Statement (SQL) subtab
This subtab allows you to investigate the SQL select statement used to retrieve the current data record. The syntax can be copied as an exemplar for data sources and other automation. To copy content from the text box, highlight the content to copy and press Ctrl+C or right-click your selection and select Copy from the context menu.
 Create a rollup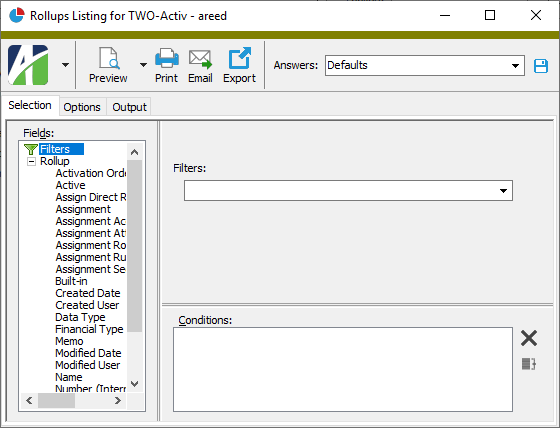
 .
.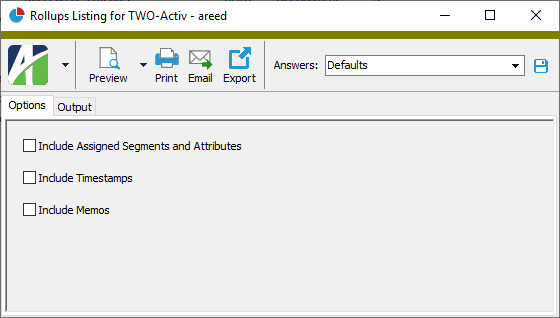
 - Provides access to two preview options.
 - Opens the Print dialog so that you can select and configure a printer and then print a paper copy of the report.
 - Opens the
  - Opens the Export Report dialog so that you can save the report to a file. File types include Crystal Reports (.rpt), PDF (.pdf), Microsoft Excel (.xls), Microsoft Word (.doc), rich text (.rtf), and XML (.xml).