User locations help you determine the whereabouts of system and/or company authorized users. Before a user location record can be created for a user, the user must first be set up as an authorized user. User locations installed below the ActivityHD System folder use system authorized users; user locations installed below a company folder use company authorized users.
User locations serve the same function as a sign in/sign out board in your office. When viewed in the HD view, by default the user name, location, in/out status, personal status, department, and phone number are shown. The location listed can be as descriptive as you need it to be. In general, the location should indicate where you are and, if out of the office, when you expect to return.
Examples
"In the office"
"Lunch"
"Gone for the day"
"PTO - back on Wednesday"
"Gone to bank; back in 30 minutes"
When a user updates their location, the date and time are updated as well. This helps users keep track of time in and time out of the office.
A user can create a list of favorite user locations to make it easy to update their location.
In the Navigation pane, highlight the User Locations folder.
Click . The New User Location window opens.
In the User field, select the authorized user to associate with the user location.
In the Location field, enter a description of the user location or select a favorite user location from the drop-down list.
If the location is outside the office, mark the Out of Office? checkbox.
If the user is not on company time while at the location, mark the Personal Time? checkbox.
In the Days to Keep in History field, enter the number of days you want to be able to view history of this user location. This history information is available to the User Locations History Report. Leave this field blank to keep the user location in history indefinitely.
In the Phone Numbers section, provide one or more phone numbers where the user can be reached while at the user location.
As appropriate, also provide a department, email addresses, and/or an SIP address where the user can be reached. The email address you enter in the Email 1 field is used to open a pre-addressed email message to the user. The Email Message command can be accessed when the user location is selected in the HD view by selecting > Edit > Email Message or by right-clicking the user location and selecting Email Message from the shortcut menu. Similarly, the SIP address is used to open your instant messaging application with a message pre-addressed to the user. The Instant Message command can be accessed when the user location is selected in the HD view by selecting > Edit > Instant Message or by right-clicking the user location and selecting Instant Message from the shortcut menu.
User locations are intended to facilitate communication between authorized users. For example, if you need to run an errand outside the office, you can change your user location to reflect that; your location is automatically updated in the HD view. All authorized ActivityHD users will be able to see where you are and when you expect to return. This can be especially helpful for the person answering the phones or directing traffic in your business.
When you change your user location, the HD view automatically displays your new location. You do not need to refresh the display each time you change your location.
Favorite locations are the locations you use frequently such as "In the office", "Lunch", "Working from home", "In a meeting", etc. While you can type your new location each time it changes, it is faster to simply select a location from the My Location drop-down menu in the toolbar.
To create a new favorite location:
In the Navigation pane, right-click the User Locations folder and select Maintain Favorites from the shortcut menu. The Favorite User Locations window opens.
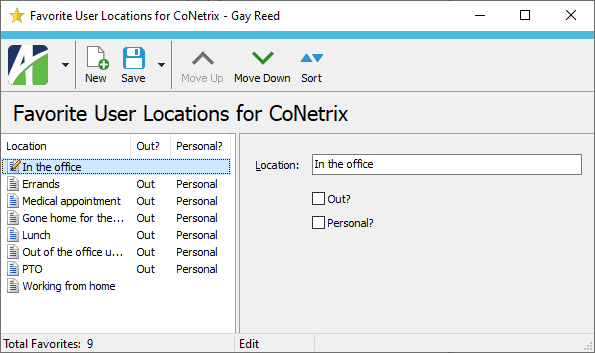
Click . The controls in the right pane are blanked out.
In the Location field, enter a label for the new favorite location.
Mark the Out? checkbox if the location is outside the office.
Mark the Personal? checkbox if time at the location is personal time.
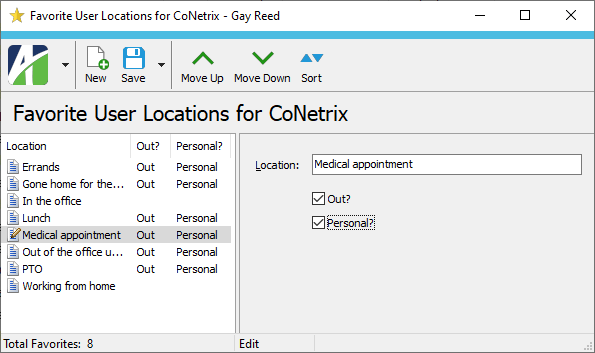
You may want the locations in your favorites list to be in a particular order. There are two ways to order the items in the My Locations drop-down menu.
In the Navigation pane, highlight the User Locations folder.
In the toolbar, click and select Maintain Favorites from the drop-down menu. The Favorite User Locations window opens.
In the left pane, highlight a location you want to move to a different position in the order, then click or until the location is in the desired position.
Repeat step 3 until you achieve the desired order.
The User Locations Listing shows the most current user location update for each user.
Content
For each user location included on the report, the listing shows:
user name
user location
whether the user is out of the office
whether the user is on personal time
the date and time of the update
the username of the person who performed the update.
In addition, you can include one or more of the following:
days and creation information
memos
custom fields.
The following total appears on the report:
record count.
Print the report
In the Navigation pane, highlight the ActivityHD System > User Locations folder.
Start the report set-up wizard.
To report on all or a filtered subset of user locations:
Right-click the User Locations folder and select Select and Report > User Locations Listing from the shortcut menu.
On the Selection tab, define any filters to apply to the data.
To report on specifically selected user locations:
In the HD view, select the users to include on the report. You can use Ctrl and/or Shift selection to select multiple records.
Click and select User Locations Listing from the drop-down menu.
To report on a particular user location from the User Location window:
In the HD view, locate and double-click the user location to report on. The User Location window opens with the user location loaded.
Click and select User Locations Listing from the drop-down menu.
Select the Options tab.
Mark the checkbox(es) for the additional information to include:
Days and Creation Info
Report Options. To include a section at the end of the report with the report settings used to produce the report, leave the checkbox marked. To produce the report without this information, clear the checkbox.
Memos
Custom Fields (only visible if custom fields are set up)
Select the Output tab.
In the Design field, look up and select the report design to use.
In the toolbar, click the icon for the type of output you want:
- Provides access to two preview options.
Preview - Click the icon or click the drop-down arrow and select Preview from the drop-down menu to view the report in the Crystal Reports viewer.
Preview to PDF - Click the drop-down arrow next to the icon and select Preview to PDF to view the report in the PDF reader.
- Opens the Print dialog so that you can select and configure a printer and then print a paper copy of the report.
- Opens the Report Email dialog so that you can address and compose an email that the report will be attached to. For best results, ensure your email client is running before you attempt to send a report via email.
- Opens a drop-down menu with two export options:
Export Report - Opens a dialog so that you can save the report to a file. File types include Crystal Reports (.rpt), PDF (.pdf), Microsoft Excel (.xls), Microsoft Word (.doc), rich text (.rtf), and XML (.xml).
Export Data - Opens a dialog so that you can export report data to XML or JSON file format.
From
The email account from which to send the email. Valid options are:
Windows user default account. Sends email using the user's Windows default email account. For most users, this is the account configured in Outlook or another email client application.
Server personal. Sends email using the email configuration for the system or company server and the email address on the current user's authorized user record. The authorized user record must have a confirmed email address.
Server generic. Sends email using the email configuration and "from" address for the system or company server. This option requires "Send generic" access to the Server Email resource.
To
The email address(es) to which to send the email. Separate email addresses with semi-colons.
CC
The email addresses to copy on the email. Separate email addresses with semi-colons.
BCC
The email addresses to blind copy on the email. Separate email addresses with semi-colons.
Subject
The subject line.
Text box
The body of the email.
Data extensions
The following data extensions are available for the report:
The User Locations History Report provides a history of user location updates by user.
Content
For each authorized user included on the report, the report shows:
location update records.
For each location update record, the report shows:
location description
number of days kept in history
whether the user was out of the office
whether the user was on personal time
the date and time of the update
the username of the person who performed the update.
Print the report
In the Navigation pane, highlight the ActivityHD System > User Locations folder.
Start the report set-up wizard.
To report on all or a filtered subset of authorized users:
Right-click the User Locations folder and select Select and Report > User Locations History Report from the shortcut menu.
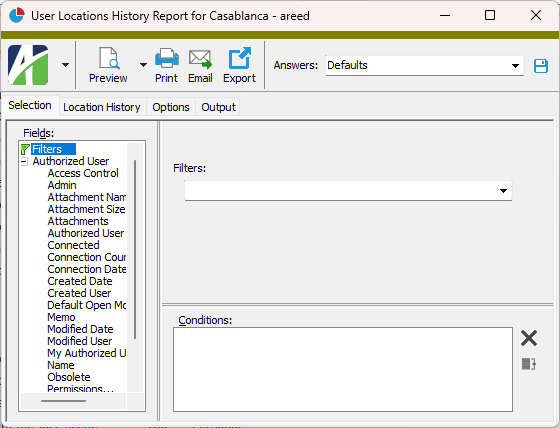
On the Selection tab, define any filters to apply to the data.
To report on specifically selected users:
In the HD view, select the users to include on the report. You can use Ctrl and/or Shift selection to select multiple records.
Click and select User Locations History Report from the drop-down menu.
To report on a particular user from the User Location window:
In the HD view, locate and double-click the user to report on. The User Location window opens with the user location loaded.
Click and select User Locations History Report from the drop-down menu.
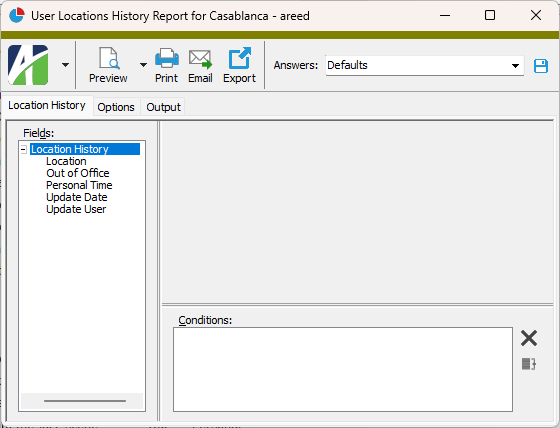
Select the Location History tab.
Define any filters you want to apply on location history.
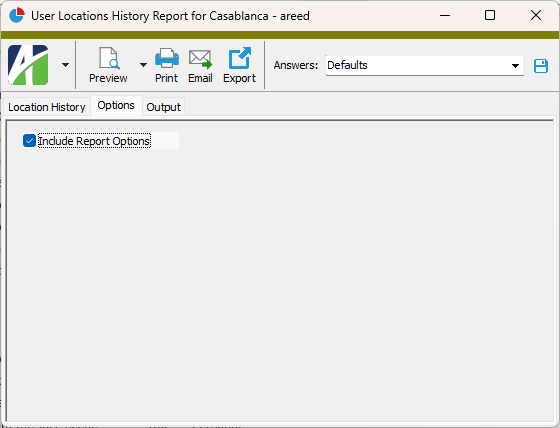
Select the Options tab.
To include a section at the end of the report with the report settings used to produce the report, leave the Include Report Options checkbox marked. To produce the report without this information, clear the checkbox.
Select the Output tab.
In the Design field, look up and select the report design to use.
In the toolbar, click the icon for the type of output you want:
- Provides access to two preview options.
Preview - Click the icon or click the drop-down arrow and select Preview from the drop-down menu to view the report in the Crystal Reports viewer.
Preview to PDF - Click the drop-down arrow next to the icon and select Preview to PDF to view the report in the PDF reader.
- Opens the Print dialog so that you can select and configure a printer and then print a paper copy of the report.
- Opens the Report Email dialog so that you can address and compose an email that the report will be attached to. For best results, ensure your email client is running before you attempt to send a report via email.
- Opens a drop-down menu with two export options:
Export Report - Opens a dialog so that you can save the report to a file. File types include Crystal Reports (.rpt), PDF (.pdf), Microsoft Excel (.xls), Microsoft Word (.doc), rich text (.rtf), and XML (.xml).
Export Data - Opens a dialog so that you can export report data to XML or JSON file format.
From
The email account from which to send the email. Valid options are:
Windows user default account. Sends email using the user's Windows default email account. For most users, this is the account configured in Outlook or another email client application.
Server personal. Sends email using the email configuration for the system or company server and the email address on the current user's authorized user record. The authorized user record must have a confirmed email address.
Server generic. Sends email using the email configuration and "from" address for the system or company server. This option requires "Send generic" access to the Server Email resource.
To
The email address(es) to which to send the email. Separate email addresses with semi-colons.
CC
The email addresses to copy on the email. Separate email addresses with semi-colons.
BCC
The email addresses to blind copy on the email. Separate email addresses with semi-colons.
Subject
The subject line.
Text box
The body of the email.
Data extensions
The following data extensions are available for the report:
Authorized users
User location history
User Location Record ID
User
The authorized user represented on the user location record.
Press F3 to look up the value.
If a value is already selected, you can press F4 to open the record in its native editor.
Location tab
Location
A description of the user's location. You can enter a location description or select a favorite location from the drop-down list. The user location is updated as soon as the record is saved.
Out of Office?
This checkbox indicates whether the user location is in or outside the office.
Personal Time?
This checkbox indicates whether time spent at the user location is considered company time or personal time.
Days to Keep in History
The number of days the user location record will be kept in history. If this field is blank, the record will be retained indefinitely.
Phone Numbers
Work
The user's work phone number.
Mobile
The user's cell phone number.
Home
The user's home phone number.
Fax
The user's fax number.
Other
Another phone number for the user.
Department
The user's department.
Email 1
The user's primary email address. This is the email address associated with the Email Message command on the shortcut menu when you right-click a user location in the HD view.
Email 2
The user's secondary email address.
SIP Address
The user's instant message address. This is the address associated with the Instant Message command on the shortcut menu when you right-click a user location in the HD view.
Custom tab
This tab is visible if custom fields exist for the entity. At a minimum, if there are custom fields, a Fields subtab will be present. One or more additional categories of subtabs may also be visible.
Fields subtab
This tab prompts for values for any custom fields set up for entity records of this entity type. Respond to the prompts as appropriate.
References subtab
This tab is visible if other records reference the current record.
Reference
From the drop-down list, select the custom field to view references for. Reference custom fields have the following format: PackageName.EntityName.CustomFieldName.
Example
Suppose a custom field exists on PRCodes that references an ARCode. On the ARCode record, on the Custom > References subtab, you can view all the PRCodes which reference that ARCode.
Exchange Folder subtab
This tab is visible only if you set up a custom field with a data type of "Exchange Folder". The label on this tab is the name assigned to the custom field.
This tab shows the contents of the specified Exchange folder.
File subtab
This tab is visible only if you set up a custom field with a data type of "File". The label on the tab is the name assigned to the custom field.
This tab renders the contents of the specified file according to its file type.
Internet Address subtab
This tab is visible only if you set up a custom field with a data type of "Internet Address". The label on this tab is the name assigned to the custom field.
This tab shows the contents of the specified web page.
Network Folder subtab
This tab is visible only if you set up a custom field with a data type of "Network Folder". The label on this tab is the name assigned to the custom field.
This tab shows the contents of the specified network folder.
The Attachments tab is visible if any record for a given entity has an attachment. If the Attachments tab is not visible, this implies that no record of the entity type has an attachment on it; however, once an attachment is added to any record of the entity type, the Attachments tab will become available.
Attachments
The list box shows the files which are attached to the current record. Highlight a file name to preview the file in the adjacent pane. Double-click a file name to open the file in its native editor.
Preview pane
If a file name is highlighted in the Attachments list box, this pane shows a preview of the file contents. Some file types cannot be previewed but can be double-clicked to open in their native editor.
Other tab
Memo tab
To include additional information about this record not collected elsewhere, enter it in this text box. This area supports common keyboard shortcuts such as Ctrl+C to copy and Ctrl+V to paste.
Timestamps tab
This tab shows the user who created this record and the date and time of creation as well as the user, date, and time of the latest modification to the record.
User locations security
Common accesses available on user locations
Access
A user with this access can...
Change
Use the mass change action on user locations.
Change Logs
Custom Fields
Create and edit custom fields for user locations.
Data
Have read-only access to user locations from anywhere in the software (e.g., field validations, filters, date expressions).
Delete
Delete user locations.
Edit
Edit user location records.
Export
Export user location records from ActivityHD.
Import
Import user location records into ActivityHD.
New
Create new user location records.
Read
Have read-only access to user location records.
Report
Run reports with user location information.
Report Designs
Create and edit report designs with user location information. This access enables the Report Designs button on the Output tab of report dialogs.
Shared Answers
Create and edit saved answers related to user locations.
Shared Filters
Create and edit shared filters on user locations.
Visible
View the User Locations folder in the Navigation pane.
 Create a user location
 . The New User Location window opens.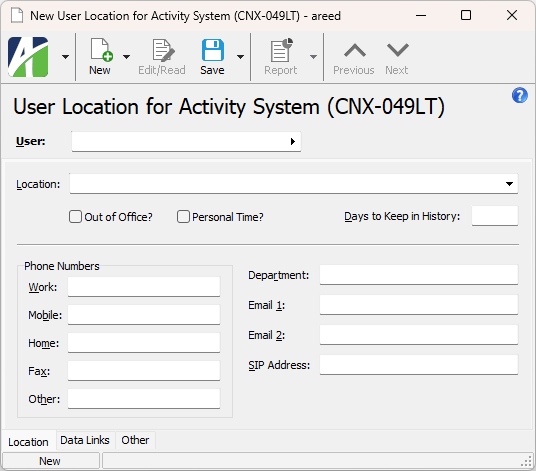
 > Edit > Email Message or by right-clicking the user location and selecting Email Message from the shortcut menu. Similarly, the SIP address is used to open your instant messaging application with a message pre-addressed to the user. The Instant Message command can be accessed when the user location is selected in the HD view by selecting
  and select a location from the drop-down menu.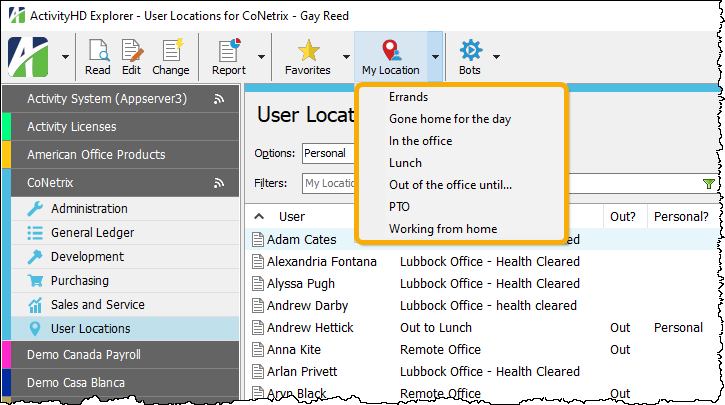
 to open the record in the User Location window in edit mode.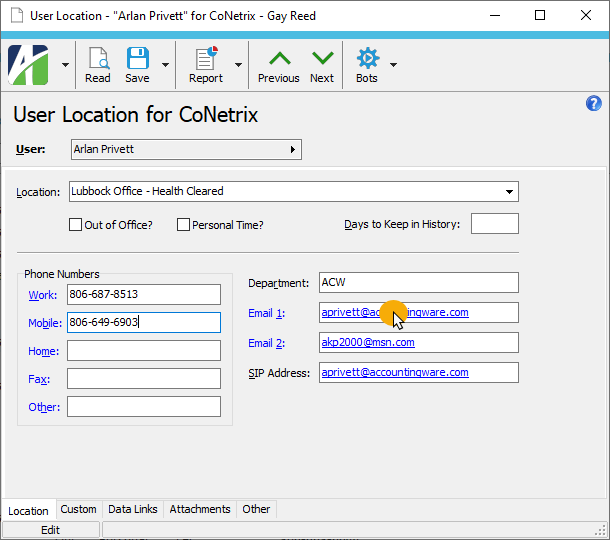
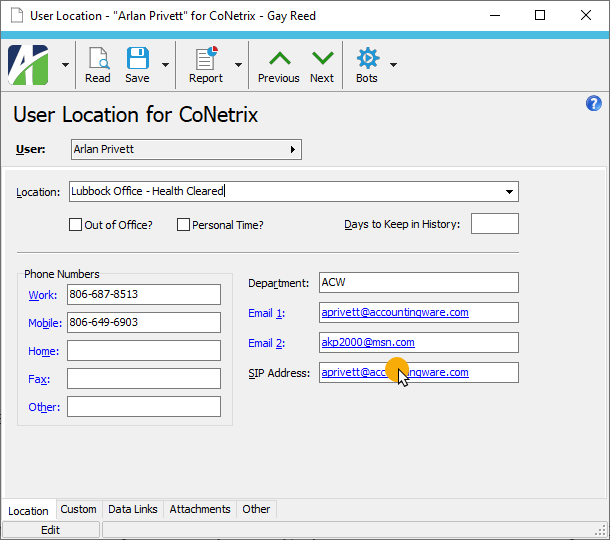
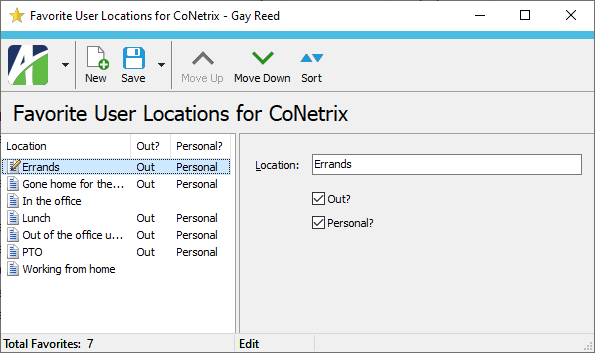
 and select Maintain Favorites from the drop-down menu. The Favorite User Locations window opens.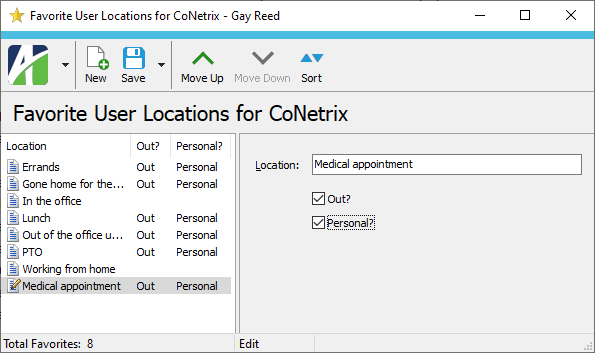
 .
. 
 or
or  until the location is in the desired position.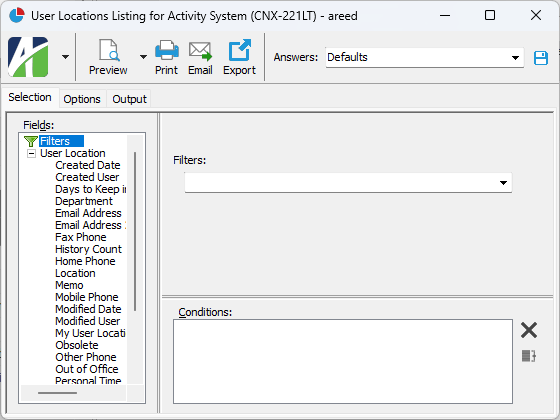
 and select User Locations Listing from the drop-down menu.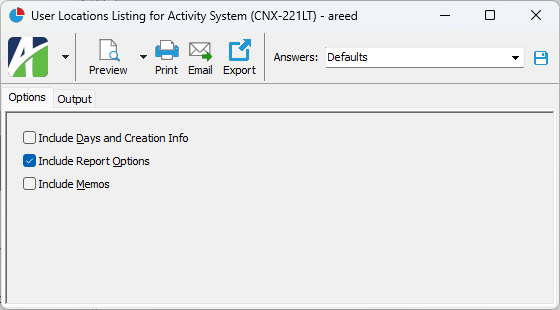
 - Provides access to two preview options.
 - Opens the Print dialog so that you can select and configure a printer and then print a paper copy of the report.
 - Opens the
  - Opens a drop-down menu with two export options: