The Financial View Item window provides journal detail drilldown for financial amount columns, giving you an easy way to investigate the postings behind a summarized total in a financial view.
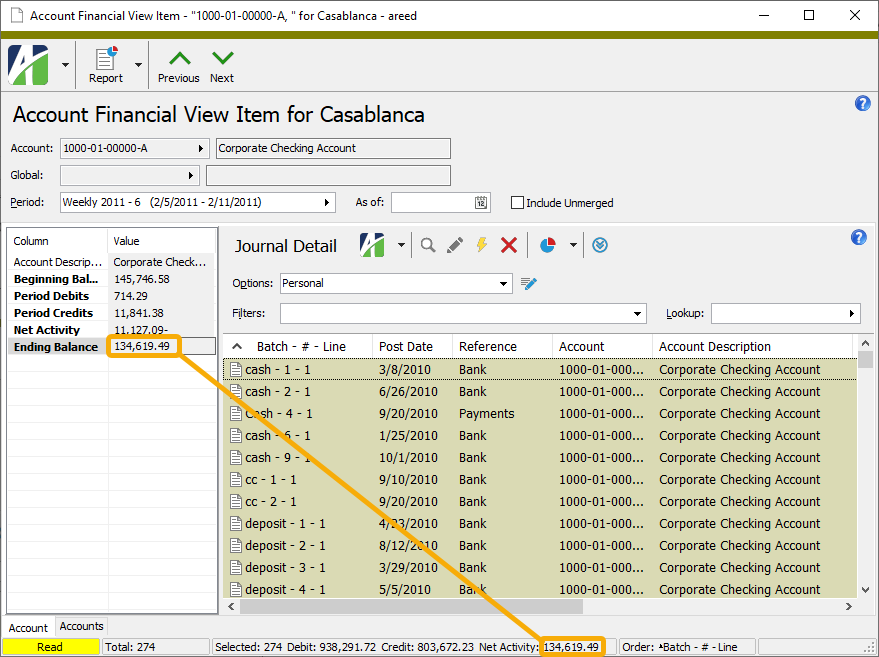
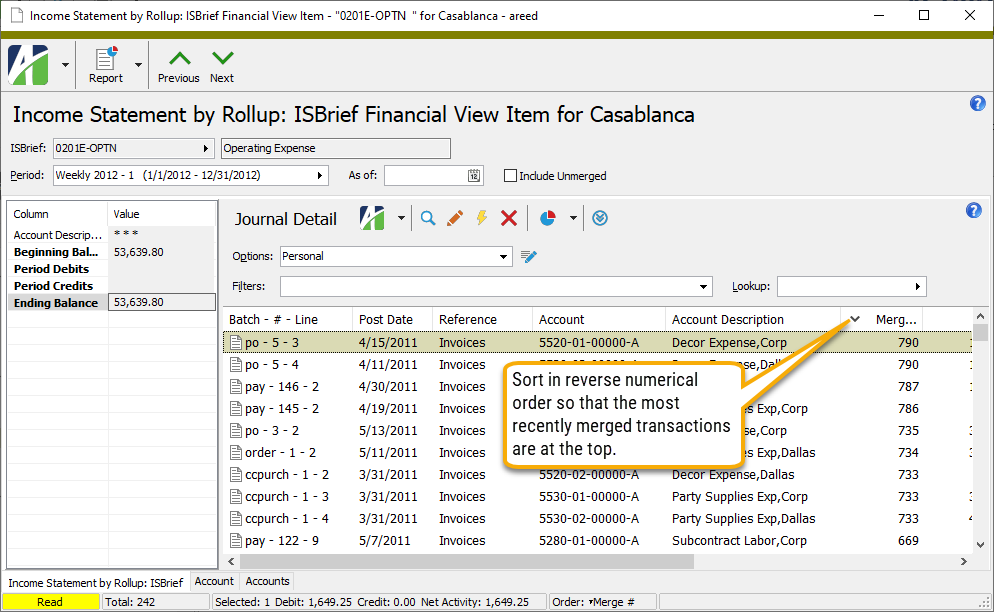
Put focus in the Journal Detail pane and press Ctrl+A to select all rows in the view. Notice that the net activity reported in the status bar matches the total you selected in the Value column.
Use one or more of the following suggestions to investigate the summarized total:
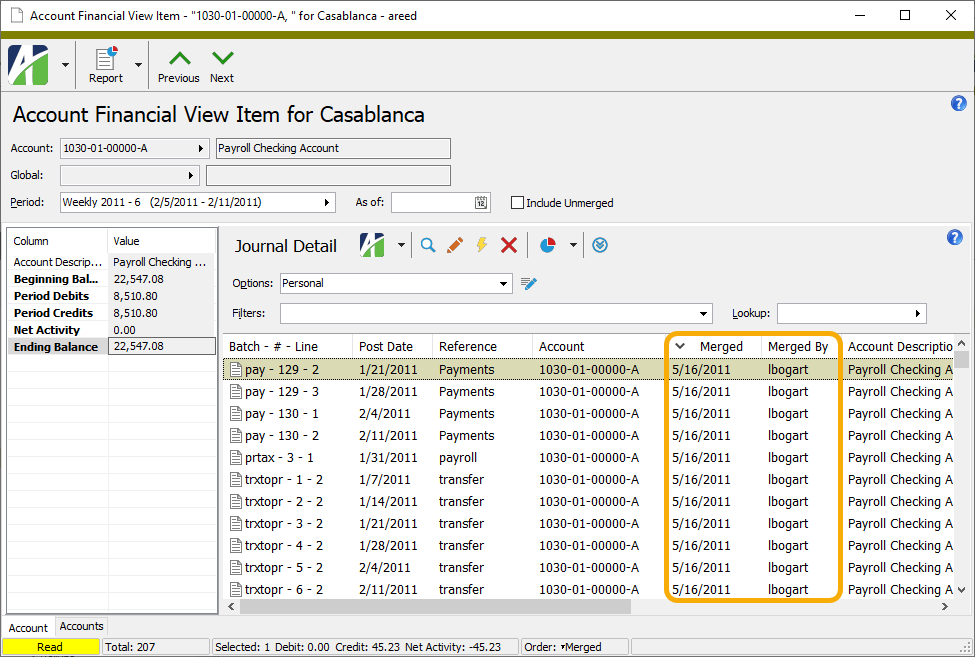
Show the "Entry Merged By" and "Entry Merged (Date)" columns to see when the journal entry was merged and by whom.
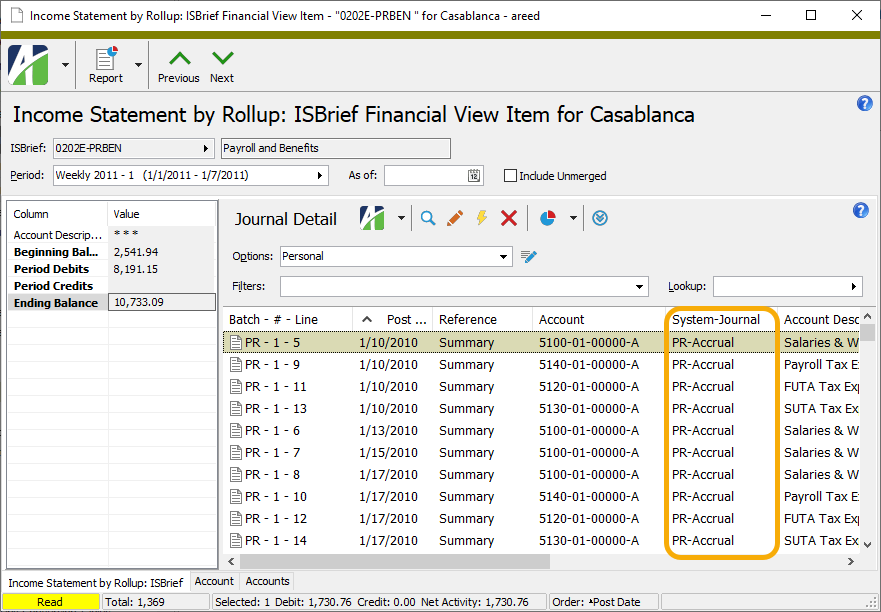
Show the "Entry System-Journal Source" column to ensure that postings for a subsidiary control account such as "Accounts Payable" actually came from the subsidiary package.
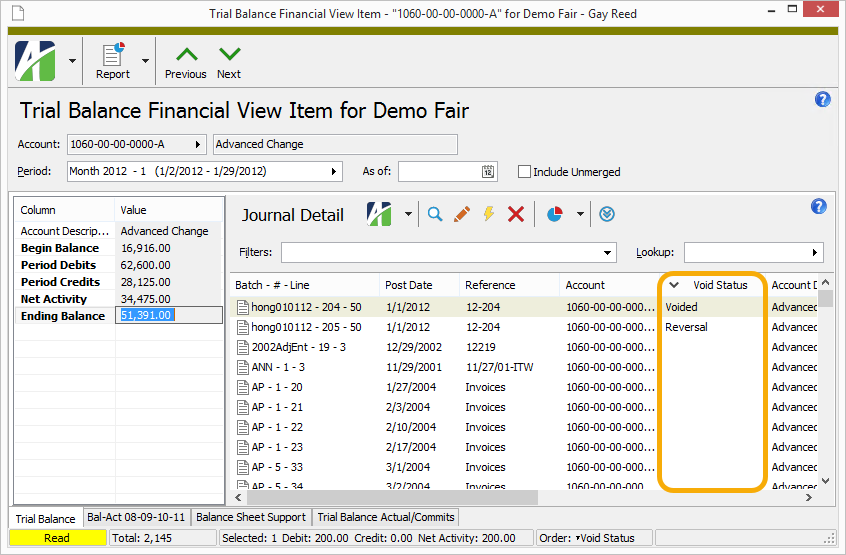
Show the "Entry Void Status (Voided/Reversal)" column to see which entries have been reversed.
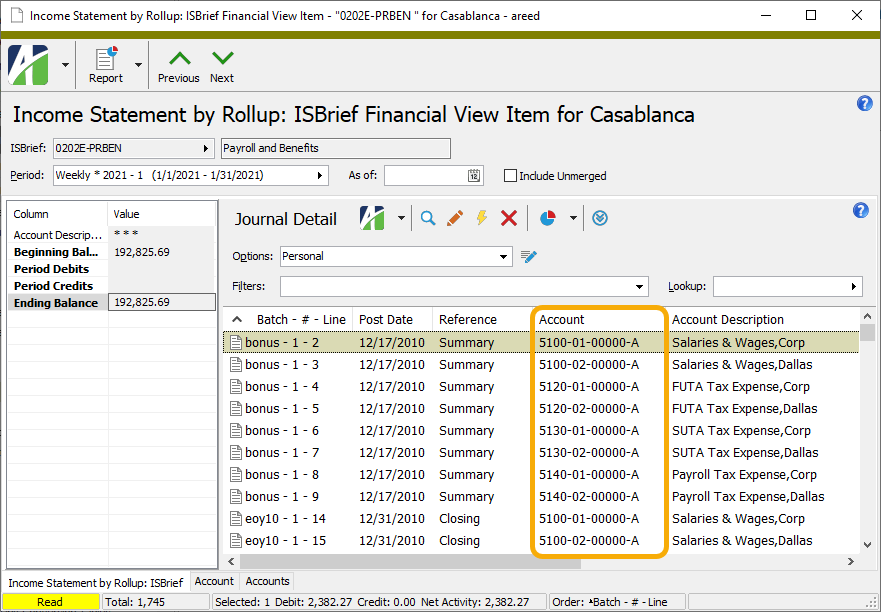
Show the "Account" column to ensure that your rollup structure is including the correct accounts.
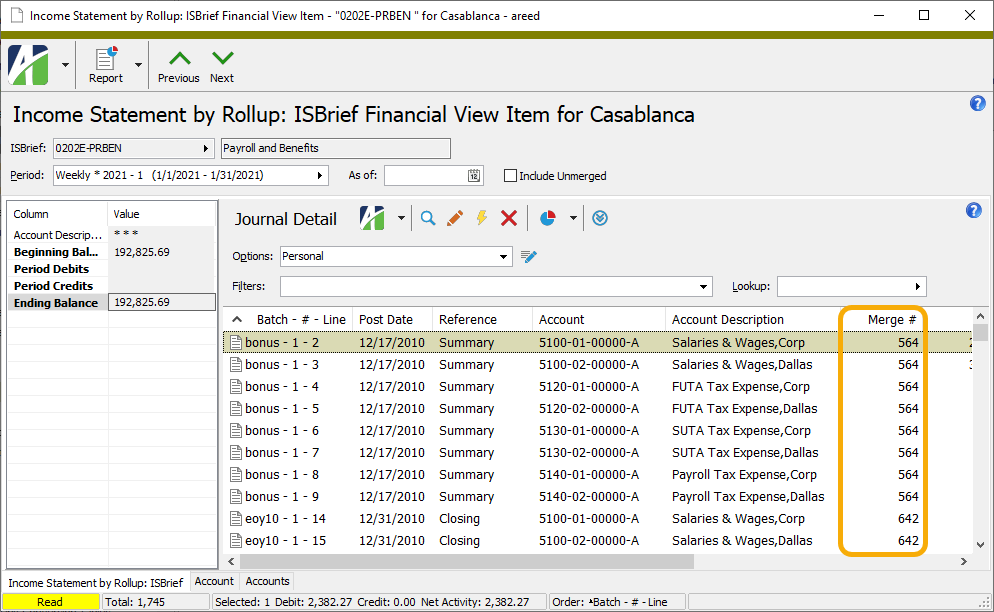
If you're including unmerged entries, show the "Entry Merge #" column to see which entries are unmerged.
If the total was correct a few days prior, sort by the Merge # column to view the most recent postings (since they are the likeliest cause of the problem).
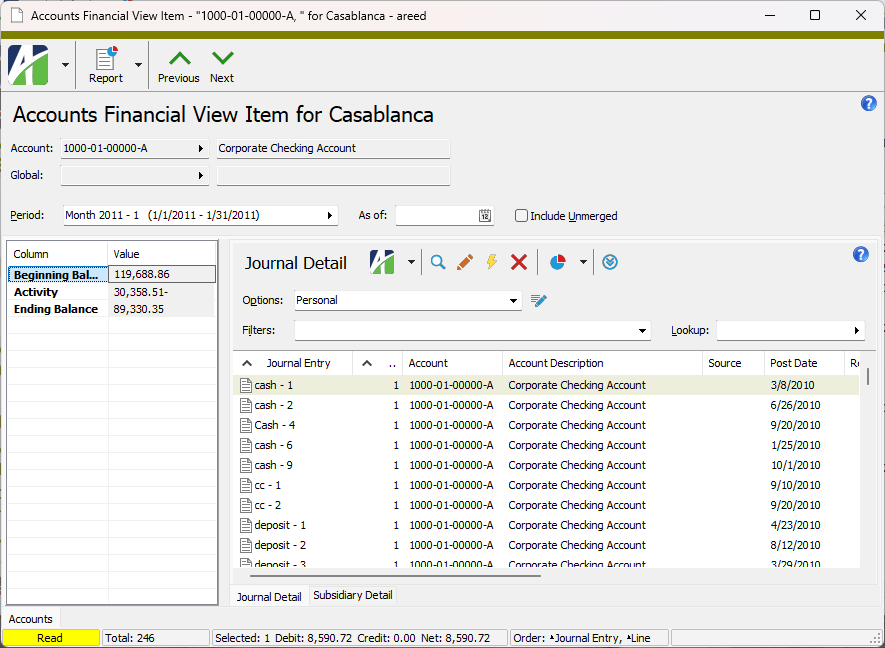
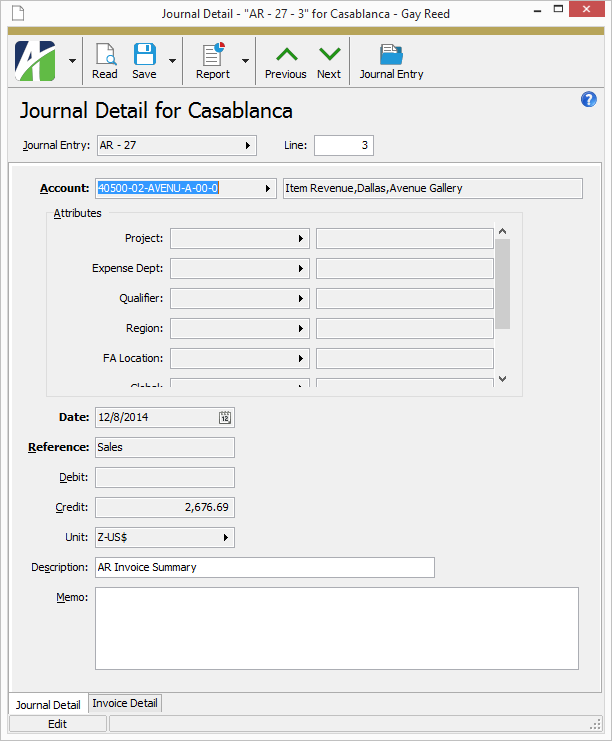
Locate the detail line to investigate in the Journal Detail pane and double-click it. The detail record opens in the Journal Detail window.
Use the following suggestions to investigate the detail line further:
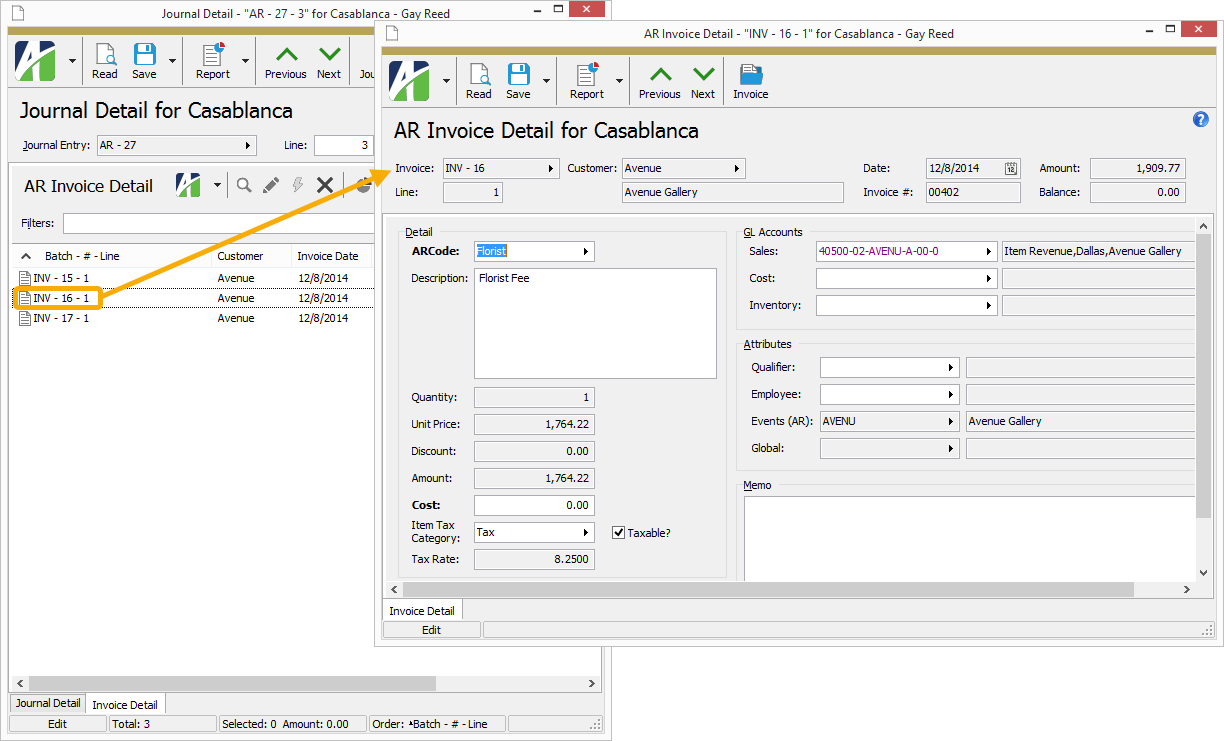
If the journal detail is a summarized posting from a subsidiary package such as Accounts Receivable, an additional tab sheet will be visible so that you can see subsidiary detail. Select the tab to see the transactions which were summarized into the detail posting. You can also drill down on individual transactions to continue your investigation, including viewing any attachments to the originating transaction.
Click to drill down to the associated journal entry in the Journal Entry window to see what else was posted with the detail line.
Since version 6.16 of ActivityHD, new General Ledger installations have been provided a pre-installed Trial Balance financial view. In version 6.21, a corresponding pre-installed report design for the Trial Balance financial view was introduced.
Purpose
The Financial View Report allows you to produce dynamic financial statements for analysis.
Content
The output of a Financial View Report depends on the particular financial view and your report design.
Print the report
In the Navigation pane, highlight the General Ledger > Financial Views folder and then highlight a financial view subfolder.
Start the report set-up wizard.
To report on all or a filtered subset of financial view items:
Right-click the financial view subfolder and select Select and Report > Financial View Report from the shortcut menu.
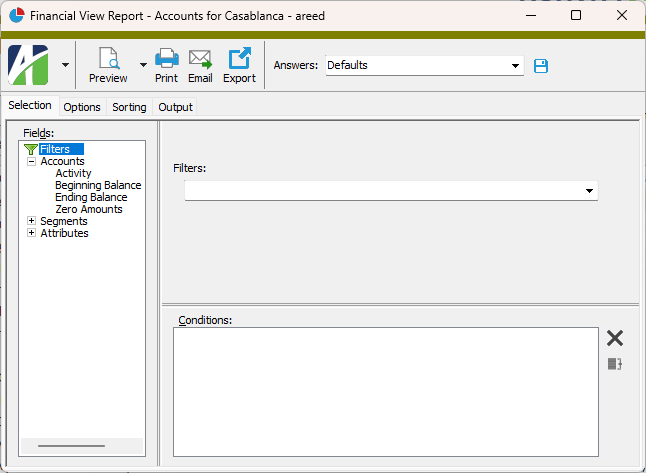
On the Selection tab, define any filters to apply to the data.
To report on specifically selected financial view items:
In the HD view, select the financial view items to include on the report. You can use Ctrl and/or Shift selection to select multiple records.
Click .
To report on a particular financial view item from the Financial View Item window:
In the HD view, locate and double-click the financial view item to report on. The Financial View Item window opens with the financial view item loaded.
Click .
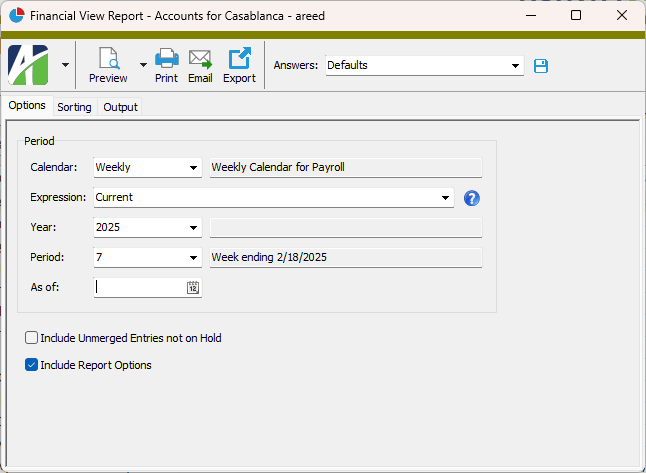
Select the Options tab.
From the Calendar drop-down list, select the GL calendar to base the report on.
To define the reporting period using a relative expression, select or enter the period expression in the Expression field. If you prefer to explicitly enter the year and period, skip to step 6.
You can select from the following common period expressions:
Current
Current - 1 period
Current - 1 year
Alternatively, you can type a valid period expression in the field. For help on period expression syntax, click the help button to the right of the field.
If you select or enter a period expression, ActivityHD adjusts the values in the Year and Period fields accordingly.
If you enter a period expression, skip to step 8.
From the Year drop-down list, select the year of the period to report on.
From the Period drop-down list, select the financial period to report on.
If you only want the report to reflect postings through a particular date, enter the date in the As of field. All postings after the as of date are ignored. The as of date must fall between the current period begin and end dates.
To include unmerged entries that are not on hold in the report results, mark the Include Unmerged Entries Not on Hold checkbox.
To include a section at the end of the report with the report settings used to produce the report, leave the Include Report Options checkbox marked. To produce the report without this information, clear the checkbox.
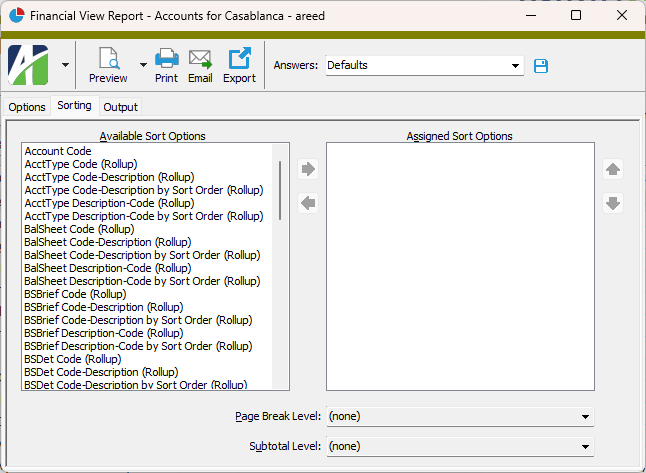
Select the Sorting tab.
In the Available Sort Options list box, highlight the field(s) to sort by, then click to move your selection(s) to the Assigned Sort Options list box.
If you selected multiple sort fields, use and to arrange the sort fields in the order you want them applied.
To start a new page for each change in one of the sorting options you specified, select the sorting option to break on from the Page Break Level drop-down list. If you do not want to insert page breaks, accept "(none)".
To subtotal based on one of the sorting options you specified, select the sorting option to subtotal on from the Subtotal Level drop-down list. If you do not want to show subtotals, accept "(none)".
Select the Output tab.
In the Design field, look up and select the report design to use.
In the toolbar, click the icon for the type of output you want:
- Provides access to two preview options.
Preview - Click the icon or click the drop-down arrow and select Preview from the drop-down menu to view the report in the Crystal Reports viewer.
Preview to PDF - Click the drop-down arrow next to the icon and select Preview to PDF to view the report in the PDF reader.
- Opens the Print dialog so that you can select and configure a printer and then print a paper copy of the report.
- Opens the Report Email dialog so that you can address and compose an email that the report will be attached to. For best results, ensure your email client is running before you attempt to send a report via email.
- Opens a drop-down menu with two export options:
Export Report - Opens a dialog so that you can save the report to a file. File types include Crystal Reports (.rpt), PDF (.pdf), Microsoft Excel (.xls), Microsoft Word (.doc), rich text (.rtf), and XML (.xml).
Export Data - Opens a dialog so that you can export report data to XML or JSON file format.
From
The email account from which to send the email. Valid options are:
Windows user default account. Sends email using the user's Windows default email account. For most users, this is the account configured in Outlook or another email client application.
Server personal. Sends email using the email configuration for the system or company server and the email address on the current user's authorized user record. The authorized user record must have a confirmed email address.
Server generic. Sends email using the email configuration and "from" address for the system or company server. This option requires "Send generic" access to the Server Email resource.
To
The email address(es) to which to send the email. Separate email addresses with semi-colons.
CC
The email addresses to copy on the email. Separate email addresses with semi-colons.
BCC
The email addresses to blind copy on the email. Separate email addresses with semi-colons.
Subject
The subject line.
Text box
The body of the email.
Data extensions
The following data extension is available for the report:
Financial view items
Financial View Item Record ID
Account
This field is visible if the financial view is set up to "Report on Accounts" and shows the GL account number associated with the detail you are currently viewing.
[Segment/Rollup]
This field is visible if the financial view is set up to report on one or more specific segments and/or rollups and shows the segment item or rollup item associated with the detail you are viewing. There can be multiple segment/rollup fields.
[Attribute]
This field is visible if the financial view is set up to report on one or more attributes and shows the attribute item associated with the detail you are viewing. There can be multiple attribute fields.
Period
The reporting period selected for the financial view. To specify an explicit reporting period or to select or enter a relative period expression, click the right arrow to open the Calendar Period popup. An asterisk (*) after the period name indicates a relative period expression is applied.
As of
The date through which to include posting amounts in the column table and postings in the Journal Detail view. All postings after the as of date are ignored. The as of date must fall between the specified period begin and end dates. Leave the field blank to include all postings for the specified period.
Include Unmerged
Mark this checkbox if you want to include unmerged entries which are not on hold in the financial view results.
[Financial View Name] tab
Financial View Column table
This table shows the columns defined for the financial view and the totals or other values associated with each column for the current financial view item.
Column
The name of the column defined in the financial view.
Value
The total or other value associated with the column for the current financial view item. If the value is a total, you can click on the total to view the detail lines which comprise the total in the Journal Detail pane.
Journal Detail pane
This pane shows the Journal Detail HD view filtered to show all journal detail lines associated with the current financial view item.
Double-click a row in the pane to drill down to its record in the Journal Detail window.
Related Financial Views tabs
If you are viewing a financial view item for a financial view based on one or more designated segments or rollups, one tab displays for each compatible account-based financial view. The tab label corresponds to the name of the financial view.
The Financial View Items pane shows the Financial View Items HD view for the indicated financial view filtered to show the related detail lines in the indicated financial view. This allows you to drill down to even further detail and to perform in-depth investigation and analysis of your data.
Financial view items security
Common accesses available on financial view items
Access
A user with this access can...
Data
Have read-only access to financial view items from anywhere in the software (e.g., field validations, filters, date expressions).
Read
Have read-only access to financial view item records.
Report
Run reports with financial view item information.
Report Designs
Create and edit report designs with financial view item information. This access enables the Report Designs button on the Output tab of report dialogs.
Shared Answers
Create and edit saved answers related to financial view items.
Shared Filters
Create and edit shared filters on financial view items.
Visible
View the [Financial View Items] folder in the Navigation pane.
Calendar Period
Calendar
The GL calendar to use for the financial view.
Expression
A period expression which defines a relative reporting period for the financial view. You can select a period expression from the drop-down list or enter a period expression directly in the field. To explicitly specify a reporting period for the selected calendar, use the Year and Period fields instead.
The dropdown contains the following common period expressions:
Current
Current - 1 period
Current - 1 year
For help with proper period expression syntax, click the help button to the right of the field.
Year
The year from the GL calendar to use for the financial view. If a period expression is entered in the Expression field, ActivityHD automatically updates this field for you.
Period
The period from the selected year to use for the financial view. If a period expression is entered in the Expression field, ActivityHD automatically updates this field for you.
 View journal detail from a financial view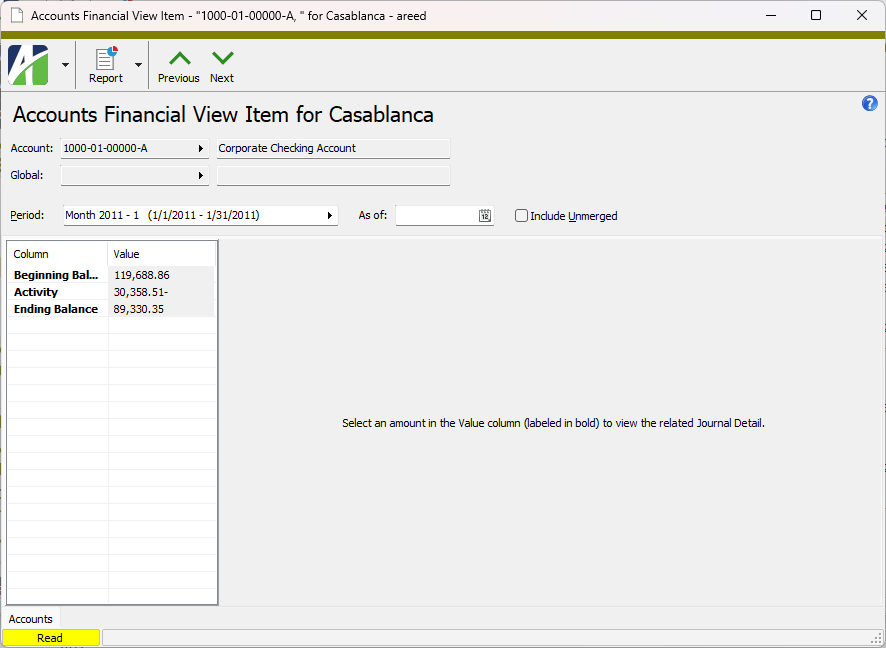
 to drill down to the associated journal entry in the Journal Entry window to see what else was posted with the detail line.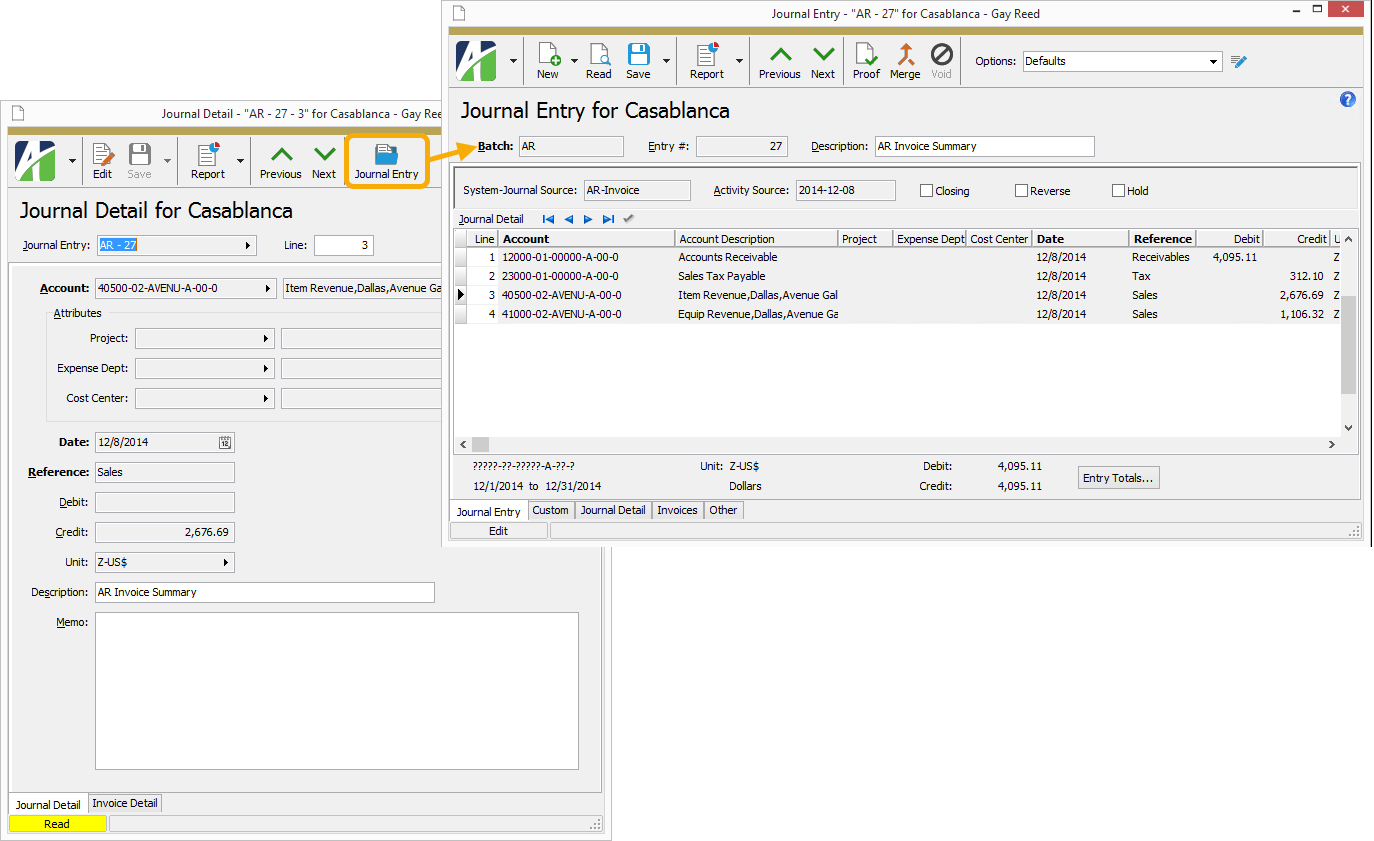
 .
.
 to move your selection(s) to the Assigned Sort Options list box.
 and
and  to arrange the sort fields in the order you want them applied.
 - Provides access to two preview options.
 - Opens the Print dialog so that you can select and configure a printer and then print a paper copy of the report.
 - Opens the
  - Opens a drop-down menu with two export options: