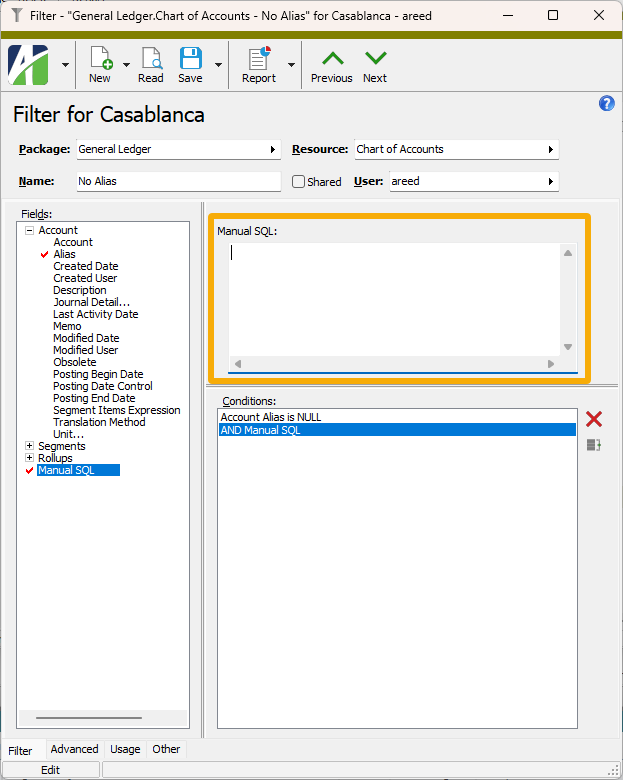
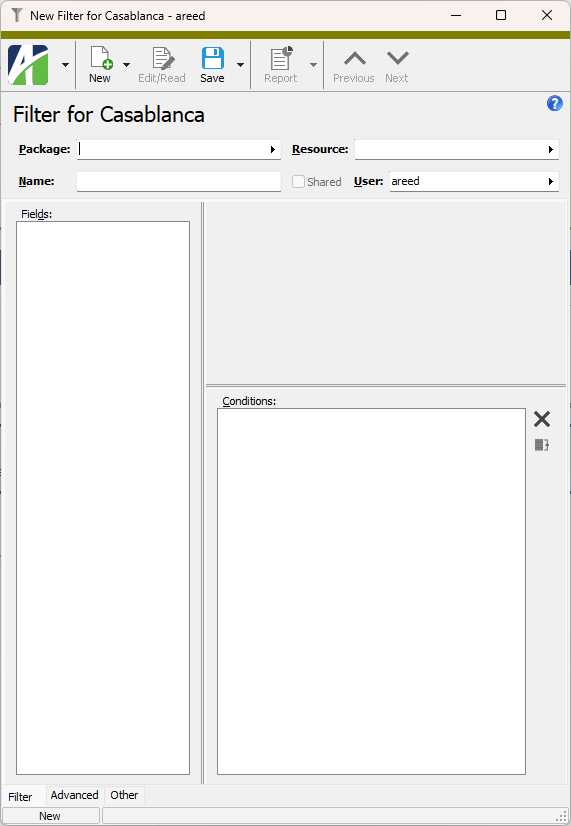
Filter Record ID
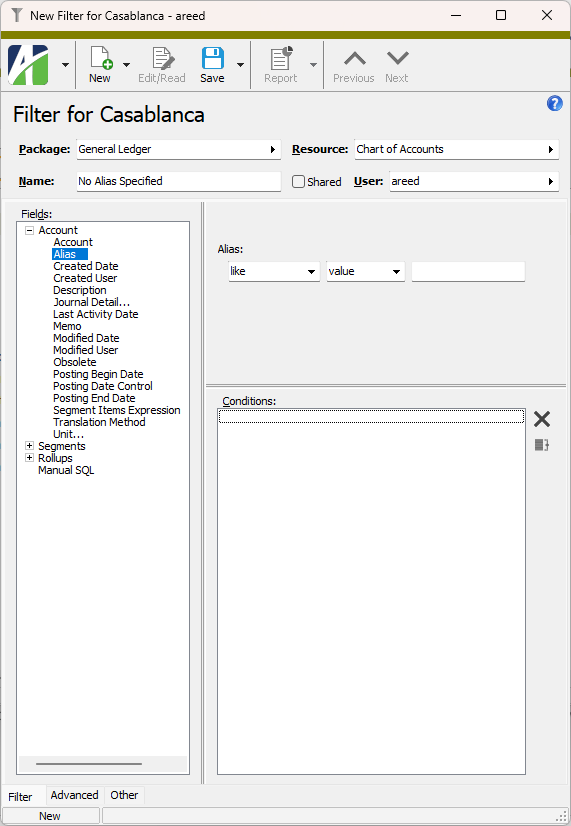
Package
The ActivityHD package associated with the filter.
Resource
The data folder to which the filter will be applied.
Name
The name of the filter.
Shared
If the checkbox is marked, indicates that the current filter is a filter that a user has decided to make available to other users.
User
This field is enabled unless the Shared? checkbox is marked. If this is not a shared filter, this field defaults to your authorized user name. If a different user has been specified as the owner of the filter, this is the specified user's authorized user name.
Filter tab
Fields list box
Lists the fields, by entity, that are available for inclusion in the filtering conditions. The nodes in the list represent entities; when a node is expanded, the available fields for that entity are shown. Items in the field list followed by an ellipsis (...) represent related entities on which conditions can be defined by clicking the More button that appears in the condition builder tool above the Conditions list box. The last item in the list, "Manual SQL", is a special option which allows you to write filter conditions using SQL directly.
Condition builder section
The prompts in this section vary depending on the field selected in the Fields list box. Respond to the prompts accordingly. The following types of prompts are common:
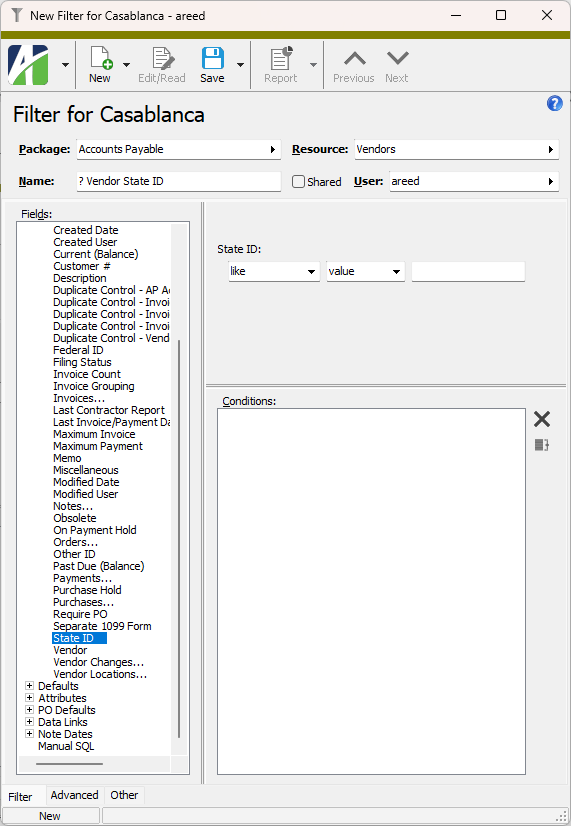
 Operator and value/parameter selectors.


To use the selector:
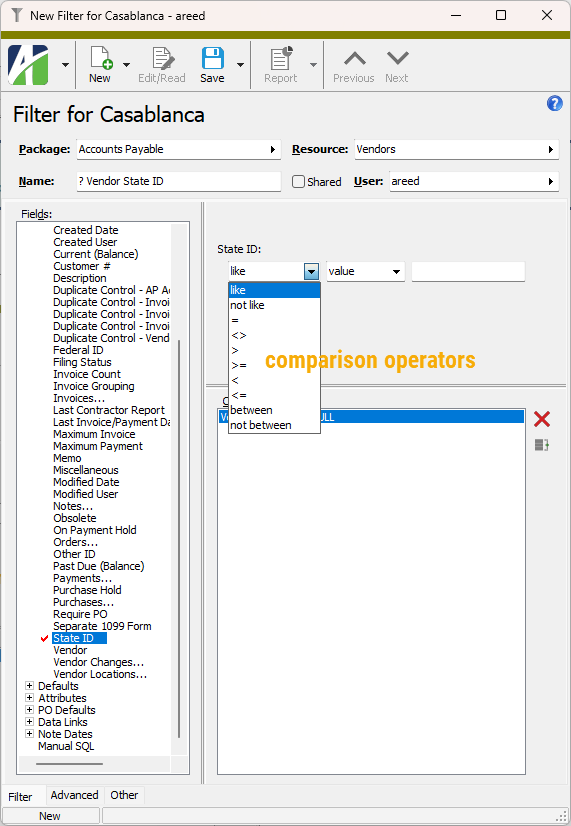
- From the first dropdown, select the operator to use to determine whether a value matches the selection criteria. Your options are:
- like
- not like
- =
- <> (not equal)
- <
- <=
- >
- >=
- between
- not between
- From the second dropdown, select how to determine the value used to return matches to the filter. Your options are:
- value. Select this option to specify an explicit value.
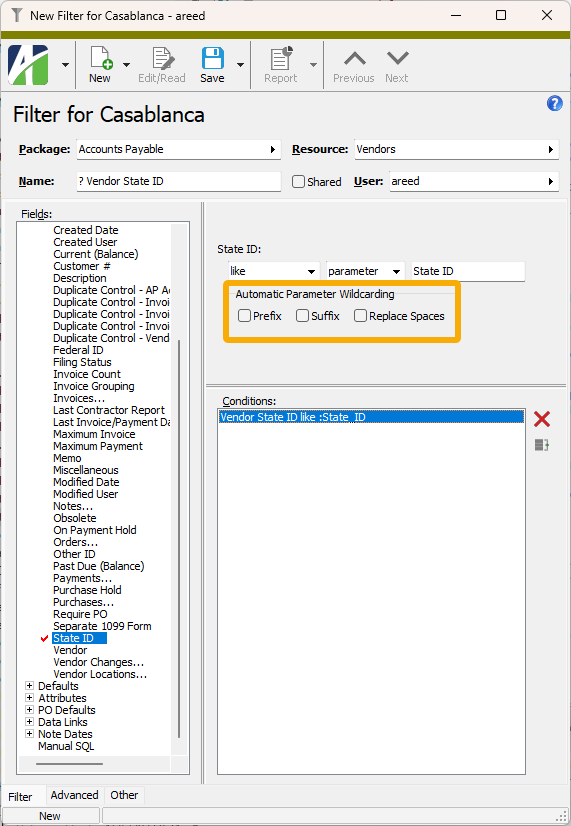
- parameter. Select this option to allow the user to select a value when the filter is invoked.
- Input in the third field depends on whether "value" or "parameter" is selected in the previous field.
- If you selected "value", enter or select the field value for the filter to match.
- If you selected "parameter", the field name is auto-filled in the third field. The user can select from a list of valid field values when the filter is invoked.
If you selected "between" or "not between" in the first field, two additional fields which mirror the second and third fields are added so that a range of values can be specified. Repeat steps 2 and 3 to complete these fields.

Operator, value/parameter, and date selectors. Very similar to the "operator and value/parameter" selector described above, except instead of specifying a field value or a field from which the user can select values, a date or date expression are prompted for.

To use the selector:
- From the first dropdown, select the operator to use to determine whether a date matches the selection criteria. Your options are:
- like
- not like
- =
- <> (not equal)
- <
- <=
- >
- >=
- between
- not between
- From the second dropdown, select how to determine the date used to return matches to the filter. Your options are:
- value. Select this option to specify an explicit date or a date expression.
- parameter. Select this option to allow the user to specify a date or date expression when the filter is invoked.
- Input in the third field depends on whether "value" or "parameter" is selected in the previous field.
- If you selected "value", enter or select the date or date expression for the filter to match.
- If you selected "parameter", the field name is auto-filled in the third field. The user can specify a date or date expression when the filter is invoked.
By default, "between" is selected in the first field, and if either "between" or "not between" are selected, two additional fields which mirror the second and third fields are displayed so that a date range can be specified. Repeat steps 2 and 3 to complete these fields.
Has/Does not have, operator, and value/parameter selectors. This type of selector appears when the filter condition is based on an entity which references the entity you are filtering on.
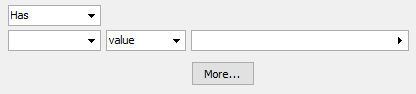
To use the selector:
- From the first dropdown, select whether the filter results should have or should not have the specified condition. Your options are:
- Has. The condition should be true for the filter results.
- Does not have. The condition should be false for the filter results.
- From the second dropdown, select the operator to use to determine whether a value matches the selection criteria. Your options are:
- like
- not like
- =
- <> (not equal)
- <
- <=
- >
- >=
- between
- not between
- From the third dropdown, select how to determine the value used to return matches to the filter. Your options are:
- value. Select this option to specify an explicit value.
- parameter. Select this option to allow the user to select a value when the filter is invoked.
- Input in the fourth field depends on whether "value" or "parameter" is selected in the previous field.
- If you selected "value", enter or select the value for the filter to match.
- If you selected "parameter", the field name is auto-filled in the fourth field. The user can select from a list of valid field values when the filter is invoked.
If you selected "between" or "not between" in the first field, two additional fields which mirror the third and fourth fields are added so that a range of values can be specified. Repeat steps 3 and 4 to complete these fields.
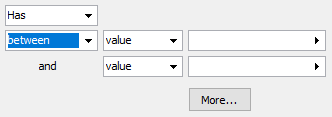
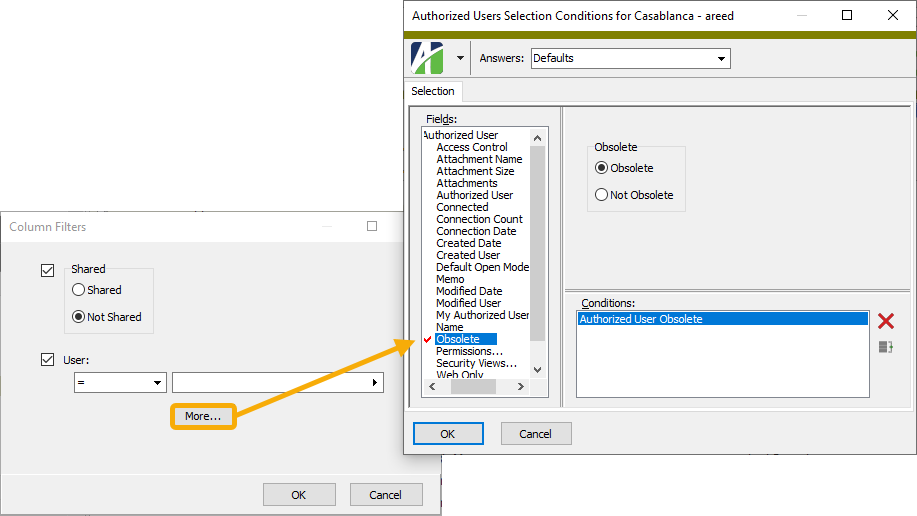
If you want to specify additional conditions on the selected entity, click More. A popup window opens with a familiar interface.
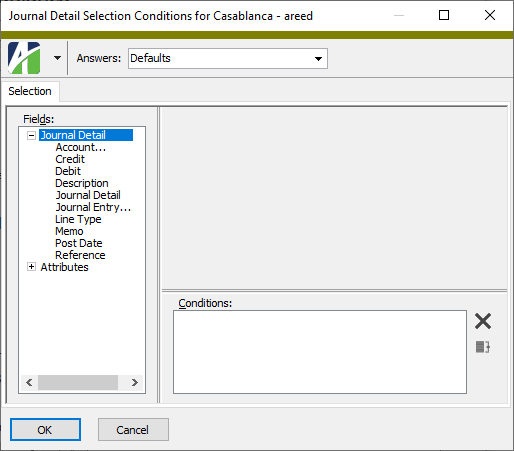
Specify conditions in the same manner as you would in the original Selection tab. When you finish, click OK to apply the conditions back in the original window.
Conditions list box
A filter condition is the predicate of a SQL WHERE clause. When the controls in the condition builder tool above are used to specify conditions, the conditions are added to this list box. The buttons next to the list box allow you to modify the listed conditions:
 - Deletes the selected condition(s) and/or grouping(s).
 - When two or more conditions are selected, groups the conditions. (Use Ctrl or Shift selection to highlight multiple items.) Grouping is indicated by (...). When the grouping indicator is selected, options appear in the condition builder tool that allow you to specify how to apply the grouped conditions.
Advanced tab
Parameters table
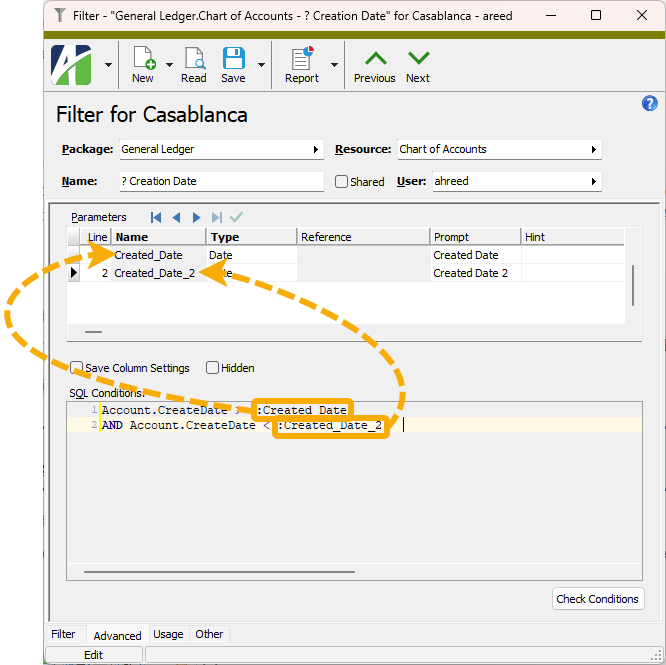
If the filter is set up to prompt for user input, the table shows each parameter prompted for and its characteristics.
Line
The line number assigned to the parameter. The cells in this column are editable and can be used to rearrange the rows in the table.
Name
The name of the parameter.
Type
The data type for the parameter value. Valid types are:
- String
- Date
- Time
- Reference
- Reference Mask
Reference
The cells in this column are disabled unless "Reference" or "Reference Mask" is selected in the Type column. If enabled, shows the resource selected to provide allowable values for the parameter.
Prompt
The label to use to prompt for the parameter value.
Hint
Hint text to help the user know what to select.
Save Column Settings
If this checkbox is marked, ActivityHD will remember the arrangement of columns used the last time you applied the filter so that it is not necessary to arrange the columns again the next time you apply the filter.
Hidden
If the checkbox is marked, the filter will be hidden from Filters drop-down lists. This option is useful if you typically use only a few filters frequently and want the filters that you rarely or never use to be out of the way.
SQL Conditions
Displays the SQL WHERE clause predicate which results from the specified filter conditions. Notice that if the SQL conditions reference one or more parameters, the parameter names are preceded with a colon (:). The content of the text box cannot be edited directly. To change the content, modify the filter conditions specified on the Filter tab.
Check Conditions button
Click this button to check the current SQL conditions for syntax errors.
Usage tab
The Filter Usage pane shows the Filter Usage HD view filtered to show all filter usage records for the selected filter.
Change Logs tab
This tab is visible if the user has "Change Logs" access to the associated data folder resource.
The Change Logs pane shows the Change Logs HD view filtered to show all change logs for the selected entity record.
Double-click a row in the pane to drill down to its record in the Change Log window.
Other tab
Memo tab
To include additional information about this record not collected elsewhere, enter it in this text box. This area supports common keyboard shortcuts such as Ctrl+C to copy and Ctrl+V to paste.
Timestamps tab
This tab shows the user who created this record and the date and time of creation as well as the user, date, and time of the latest modification to the record.
Developer tab
This tab is visible only when developer features are enabled.
Automation subtab
This subtab shows field names and values for the current data record. Use the information in the subtab to assist when creating automation objects such as bots and import files. The field names and field values can be copied from the text box and pasted directly into your code or application. To copy content from the text box, highlight the content to copy and press Ctrl+C or right-click your selection and select Copy from the context menu.
Export (XML | JSON) subtab
This subtab shows the XML syntax for exporting the selected data record. The syntax can be copied from the text box as an exemplar for creating your own automation objects for bots, import files, ActivWebAPI, etc. To copy content from the text box, highlight the content to copy and press Ctrl+C or right-click your selection and select Copy from the context menu.
Import (XML | JSON) subtab
This subtab allows you to select a file for import and shows the XML syntax for importing data records. Use the subtab to explore the XML syntax for importing data records. In particular, you can investigate the syntax which results when using Data.Import and ActivWebAPI data POST and DELETE routes.
Change Log (XML | JSON) subtab
This subtab is visible only when the Enable Change Logs option is marked in System Options or Company Options (depending on whether the feature applies at the system or the company level). This is the default setting when developer features are enabled.
This subtab allows you to investigate changes to the current data record. The syntax can be copied for use in bots, dashboards, ActivWebAPI, and other automation. To copy content from the text box, highlight the content to copy and press Ctrl+C or right-click your selection and select Copy from the context menu.
Select Statement (SQL) subtab
This subtab allows you to investigate the SQL select statement used to retrieve the current data record. The syntax can be copied as an exemplar for data sources and other automation. To copy content from the text box, highlight the content to copy and press Ctrl+C or right-click your selection and select Copy from the context menu.
 and select New Copy. Modify the copy of the built-in filter and save it with a new name.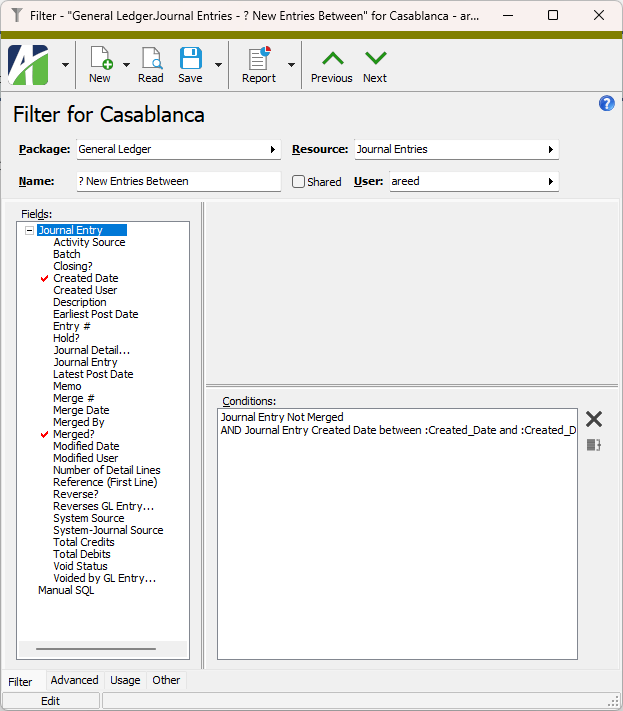
 .
.