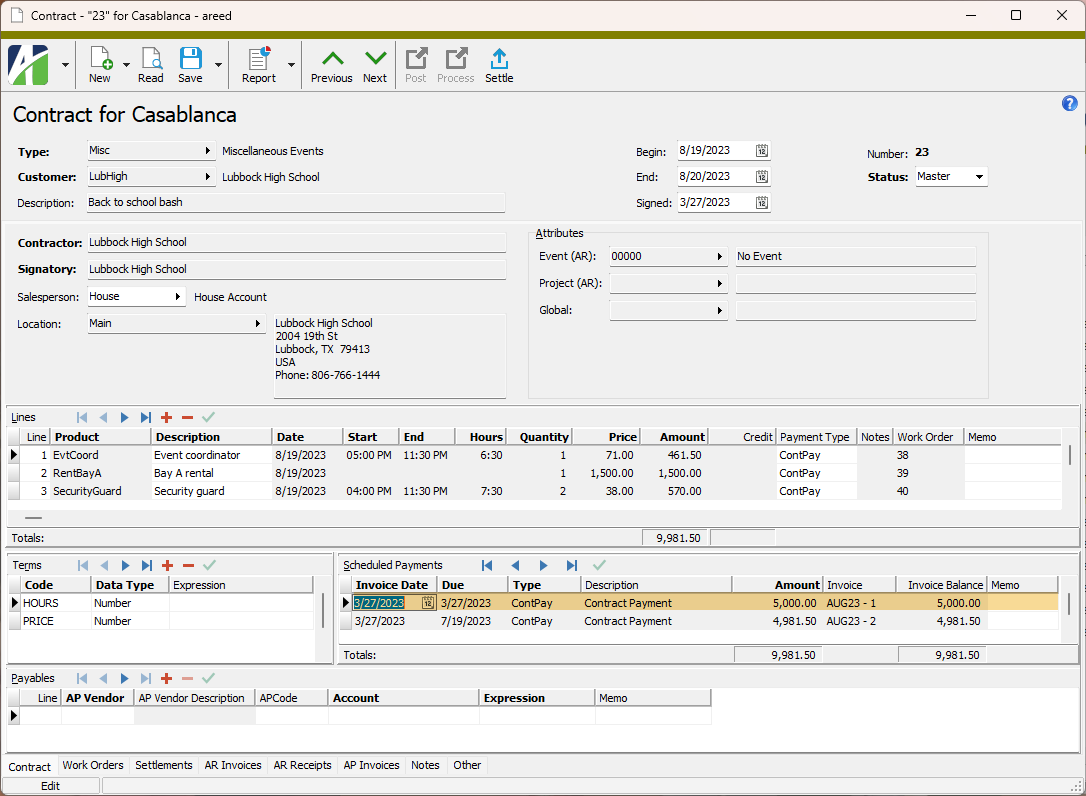
The Contract Scheduled Payments folder contains the scheduled payments on your contracts.
When you double-click a scheduled payment in the HD view, the Contract window opens with the Contract tab selected and with focus on the scheduled payment you clicked.
Post scheduled payments to Accounts Receivable
To post scheduled payments and create AR invoices for deferred revenue:
Post scheduled payments to Accounts Receivable
In the Navigation pane, highlight the Contracts Processing > Contracts > Scheduled Payments folder.
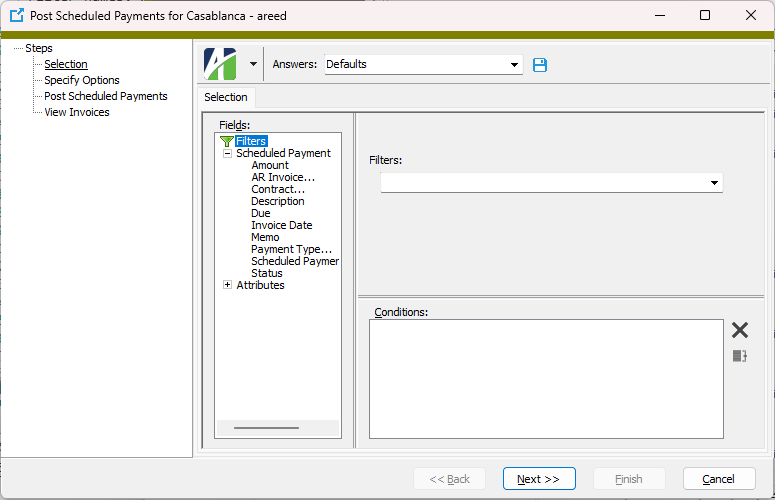
Start the Post Scheduled Payments wizard.
To post all or a filtered subset of scheduled payments:
Right-click the Scheduled Payments folder and select Select and Post Scheduled Payments from the shortcut menu.
On the Selection tab, define any filters to apply to the payments.
Click Next >>
To hand-select the scheduled payment(s) to post:
In the HD view, select the payment(s) to post. You can use Ctrl and/or Shift selection to select multiple payments.
Click .
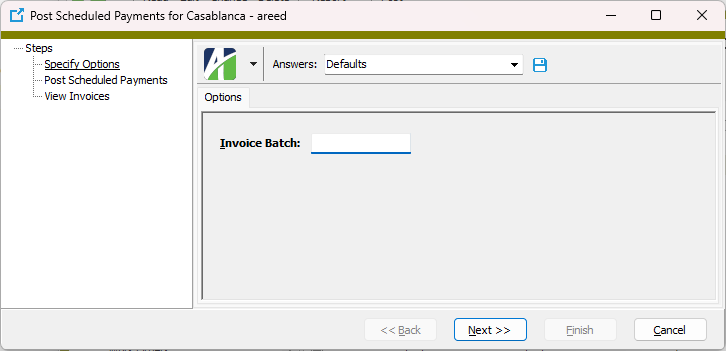
On the Options tab, enter a name for the Invoice Batch.
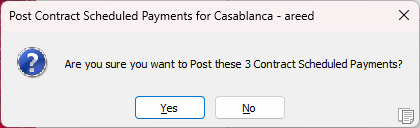
Click Next >>. ActivityHD prompts you to confirm that you want to post the selected payments.
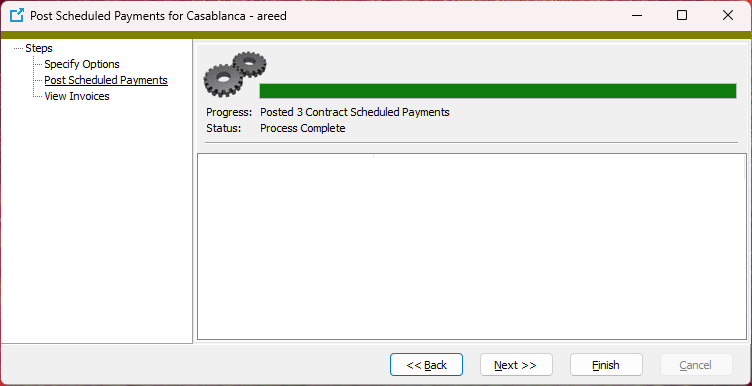
Click Yes. ActivityHD posts the payments which are valid for posting.
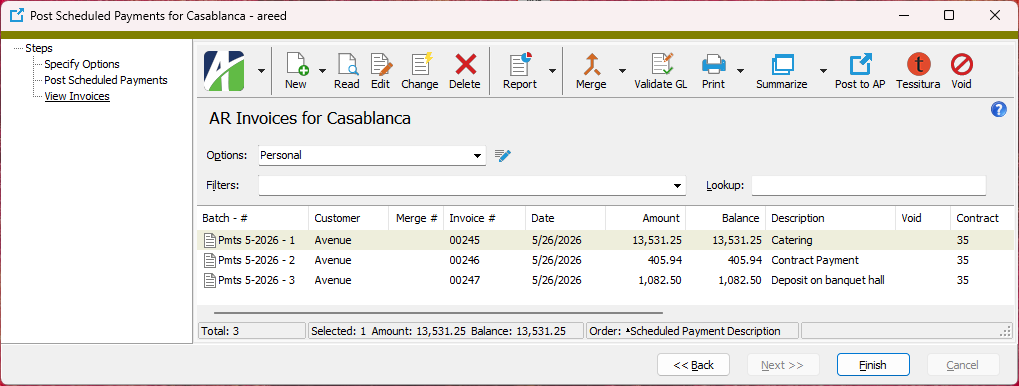
Click Next >>.
Note
The invoice date from scheduled payments is used as the AR invoice date and the GL date. This date is also used to build the invoice number when an invoice scheme is not used.
At this point, you can double-click the AR invoices in the right pane to drill down to the AR Invoice window; print the AR Invoices Listing or Tax Liability Report; or proof, merge, validate, and print AR invoices, and post them to AP.
When you finish viewing or working with the AR invoices, click Finish.
Scheduled Payment Analysis provides a list of the scheduled payments for the contracts in your system. Use this report to help manage scheduled payments. For example, the report can be sorted and subtotaled by scheduled payment status so that a user can quickly identify scheduled payments that are unpaid or that were overlooked and need to be posted to Accounts Receivable or merged in Accounts Receivable.
Content
For each payment included on the report, the listing shows:
contract number
invoice date
due date
payment type
description
payment status
invoice number
invoice balance
payment amount.
The following totals appear on the report:
grand totals
record count.
Print the report
In the Navigation pane, highlight the Contracts Processing > Scheduled Payments folder.
Start the report set-up wizard.
To report on all or a filtered subset of scheduled payments:
Right-click the Scheduled Payments folder and select Select and Report > Scheduled Payment Analysis from the shortcut menu.
On the Selection tab, define any filters to apply to the data.
To report on specifically selected scheduled payments:
In the HD view, select the scheduled payments to include on the report. You can use Ctrl and/or Shift selection to select multiple records.
Click and select Scheduled Payment Analysis from the drop-down menu.
Select the Options tab.
In the Report Title field, enter a title that summarizes the content or purpose of the report. The title appears centered at the top of each page of the report.
In the Invoice Begin Date and Invoice End Date fields, enter the range of invoice dates for which to include scheduled payments on the report.
The Include Detail checkbox is marked by default. Leave the checkbox marked to include payment detail lines on the report. Clear the checkbox to show invoice balance and payment subtotals and grand totals only.
To include a section at the end of the report with the report settings used to produce the report, leave the Include Report Options checkbox marked. To produce the report without this information, clear the checkbox.
Select the Sorting tab.
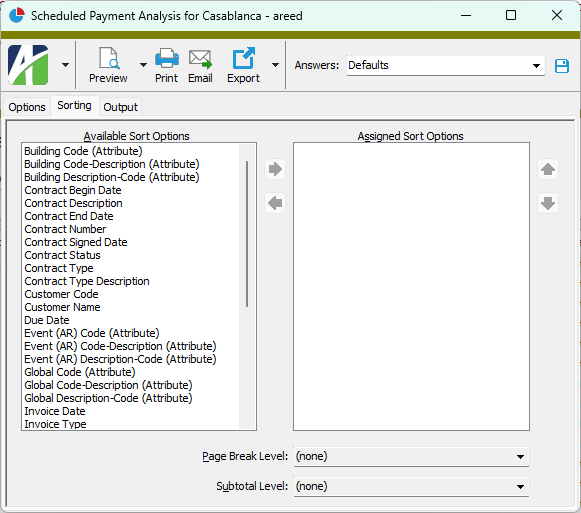
In the Available Sort Options list box, highlight the field(s) to sort the report by, then click to move your selection(s) to the Assigned Sort Options list box.
If you selected multiple sort fields, use and to arrange the sort fields in the order you want them applied.
If you want the report to start a new page for each change in one of the sorting options you specified, select the sorting option to break on from the Page Break Level drop-down list. If you do not want to insert page breaks, accept "(none)".
If you want the report to subtotal based on one of the sorting options you specified, select the sorting option to subtotal on from the Subtotal Level drop-down list. If you do not want to show subtotals, accept "(none)".
Select the Output tab.
In the Design field, look up and select the report design to use.
In the toolbar, click the icon for the type of output you want:
- Provides access to two preview options.
Preview - Click the icon or click the drop-down arrow and select Preview from the drop-down menu to view the report in the Crystal Reports viewer.
Preview to PDF - Click the drop-down arrow next to the icon and select Preview to PDF to view the report in the PDF reader.
- Opens the Print dialog so that you can select and configure a printer and then print a paper copy of the report.
- Opens the Report Email dialog so that you can address and compose an email that the report will be attached to. For best results, ensure your email client is running before you attempt to send a report via email.
- Opens a drop-down menu with two export options:
Export Report - Opens a dialog so that you can save the report to a file. File types include Crystal Reports (.rpt), PDF (.pdf), Microsoft Excel (.xls), Microsoft Word (.doc), rich text (.rtf), and XML (.xml).
Export Data - Opens a dialog so that you can export report data to XML or JSON file format.
From
The email account from which to send the email. Valid options are:
Windows user default account. Sends email using the user's Windows default email account. For most users, this is the account configured in Outlook or another email client application.
Server personal. Sends email using the email configuration for the system or company server and the email address on the current user's authorized user record. The authorized user record must have a confirmed email address.
Server generic. Sends email using the email configuration and "from" address for the system or company server. This option requires "Send generic" access to the Server Email resource.
To
The email address(es) to which to send the email. Separate email addresses with semi-colons.
CC
The email addresses to copy on the email. Separate email addresses with semi-colons.
BCC
The email addresses to blind copy on the email. Separate email addresses with semi-colons.
Subject
The subject line.
Text box
The body of the email.
Data extensions
The following data extensions are available for the report:
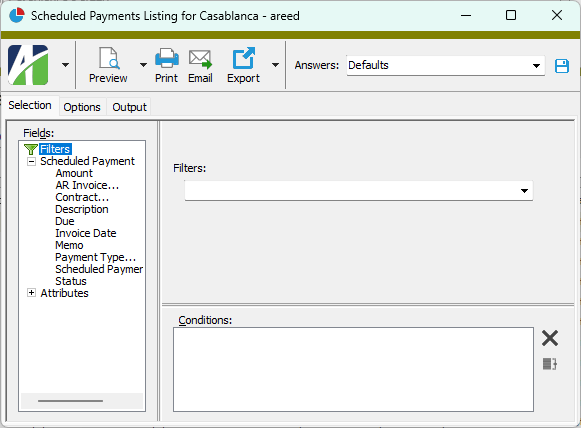
The Scheduled Payments Listing provides a list of the scheduled payments for the contracts in your system.
Content
For each contract included on the report, the listing shows:
contract number
description
customer
contract status
contract dates
scheduled payments.
For each scheduled payment included on the report, the listing shows:
invoice date
due date
payment type
description
payment status
AR invoice number
AR invoice balance
payment amount.
In addition, you can include one or more of the following:
memos
custom fields.
The following total appears on the report:
record count.
Print the report
In the Navigation pane, highlight the Contracts Processing > Scheduled Payments folder.
Start the report set-up wizard.
To report on all or a filtered subset of scheduled payments:
Right-click the Scheduled Payments folder and select Select and Report > Scheduled Payments Listing from the shortcut menu.
On the Selection tab, define any filters to apply to the data.
To report on specifically selected scheduled payments:
In the HD view, select the scheduled payments to include on the report. You can use Ctrl and/or Shift selection to select multiple records.
Click and select Scheduled Payments Listing from the drop-down menu.
Select the Options tab.
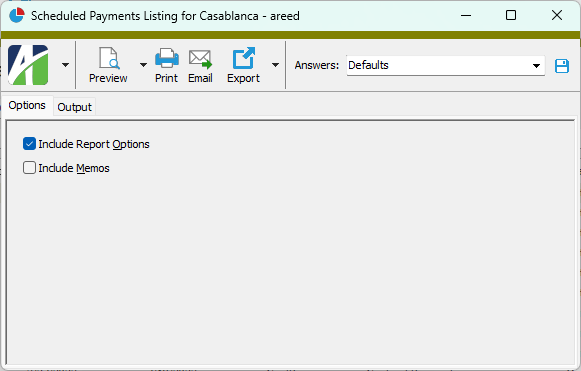
To include a section at the end of the report with the report settings used to produce the report, leave the Include Report Options checkbox marked. To produce the report without this information, clear the checkbox.
Mark the checkbox(es) for the additional information to include:
Memos
Custom Fields (only visible if custom fields are set up)
Select the Output tab.
In the Design field, look up and select the report design to use.
In the toolbar, click the icon for the type of output you want:
- Provides access to two preview options.
Preview - Click the icon or click the drop-down arrow and select Preview from the drop-down menu to view the report in the Crystal Reports viewer.
Preview to PDF - Click the drop-down arrow next to the icon and select Preview to PDF to view the report in the PDF reader.
- Opens the Print dialog so that you can select and configure a printer and then print a paper copy of the report.
- Opens the Report Email dialog so that you can address and compose an email that the report will be attached to. For best results, ensure your email client is running before you attempt to send a report via email.
- Opens a drop-down menu with two export options:
Export Report - Opens a dialog so that you can save the report to a file. File types include Crystal Reports (.rpt), PDF (.pdf), Microsoft Excel (.xls), Microsoft Word (.doc), rich text (.rtf), and XML (.xml).
Export Data - Opens a dialog so that you can export report data to XML or JSON file format.
From
The email account from which to send the email. Valid options are:
Windows user default account. Sends email using the user's Windows default email account. For most users, this is the account configured in Outlook or another email client application.
Server personal. Sends email using the email configuration for the system or company server and the email address on the current user's authorized user record. The authorized user record must have a confirmed email address.
Server generic. Sends email using the email configuration and "from" address for the system or company server. This option requires "Send generic" access to the Server Email resource.
To
The email address(es) to which to send the email. Separate email addresses with semi-colons.
CC
The email addresses to copy on the email. Separate email addresses with semi-colons.
BCC
The email addresses to blind copy on the email. Separate email addresses with semi-colons.
Subject
The subject line.
Text box
The body of the email.
Data extensions
The following data extension is available for the report:
Scheduled payments
Scheduled payments security
Common accesses available on scheduled payments
Access
A user with this access can...
Change
Use the mass change action on scheduled payments.
Data
Have read-only access to scheduled payments from anywhere in the software (e.g., field validations, filters, date expressions).
Delete
Delete scheduled payments.
Edit
Edit scheduled payment records.
Read
Have read-only access to scheduled payment records.
Report
Run reports with scheduled payment information.
Report Designs
Create and edit report designs with scheduled payment information. This access enables the Report Designs button on the Output tab of report dialogs.
Shared Answers
Create and edit saved answers related to scheduled payments.
Shared Filters
Create and edit shared filters on scheduled payments.
Visible
View the Scheduled Payments folder in the Navigation pane.
Special accesses available on scheduled payments
Access
A user with this access can...
Post
Post scheduled payments.
Scheduled payment filters
The following built-in filters are available for scheduled payments:
Filter Name
Effect
? Contract Number
Prompts for a contract number and lists the scheduled payments with the specified contract number.
? Contract Type
Prompts for a contract type and lists the scheduled payments with the specified contract type.
? Customer Code
Prompts for a customer code and lists the scheduled payments with the specified customer code.
? Due Date Range
Prompts for a range of due dates and lists the scheduled payments with a due date in that date range inclusive. Blank Begin Date and/or End Date are allowed.
? Invoice Date Range
Prompts for a range of invoice dates and lists the scheduled payments with an invoice date in that date range inclusive. Blank Begin Date and/or End Date are allowed.
? Payment Type
Prompts for a payment type and lists the scheduled payments with the specified payment type.
Outstanding Payment Invoices
Lists the scheduled payments with outstanding payment invoices.
 .
.
 Scheduled Payment Analysis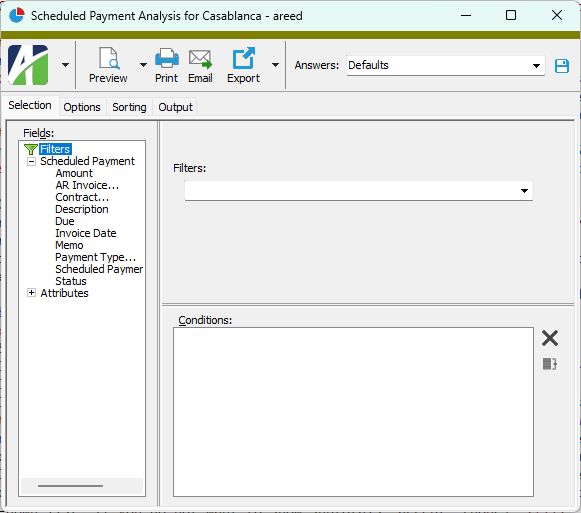
 and select Scheduled Payment Analysis from the drop-down menu.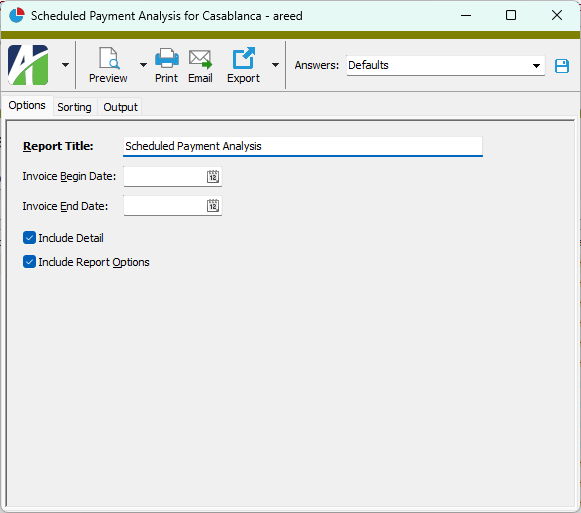
 to move your selection(s) to the Assigned Sort Options list box.
 and
and  to arrange the sort fields in the order you want them applied.
 - Provides access to two preview options.
 - Opens the Print dialog so that you can select and configure a printer and then print a paper copy of the report.
 - Opens the
  - Opens a drop-down menu with two export options: