Deposit Type Record ID
Code
A unique code for the deposit type.
Examples
Consider the following possible deposit types:
- Cash/Checks
- MC/Visa
- AMEX
- Lock Box
- PayPal
Description
A description of the deposit type.
Deposit Type tab
GL Batch
The batch name to associate with the deposit type. The batch name is used on all deposit receipts for the deposit type. This ensures that all receipts for a given deposit type are summarized into the same GL entry.
Bank Account
The bank account to post deposit receipts to for this deposit type. All receipts for a given deposit type must post to the same bank account to ensure the appropriate bank reconciliation is generated.
Press F2 to open the Account Expand dialog box where you can look up an account number, find an account number by its alias, build the account number by segment, or view setup and setup sources.
Press F3 to look up the account.
If an account is already selected, you can press F4 to open the record in the Account window.
Deposit Reference
The literal text and/or keywords to use to generate the deposit reference that appears on deposits of this type. The deposit reference can be up to 20 characters long. The reference is copied to the bank reconciliation transaction's Reference field when the transaction is created during GL merge.
Note
Changes to the deposit type do not affect existing deposits, so you can change how the deposit reference is generated on future deposits without impacting existing deposits.
Deposit Description
The literal text and/or keywords to use to generate the deposit description that appears on deposits of this type. The deposit description can be up to 40 characters long. The description is copied to the bank reconciliation transaction's Description field when the transaction is created during GL merge.
Receipt Types
The receipt type(s) allowed by the deposit type. If you enter multiple receipt types, separate them with commas. A receipt is only included in a deposit if the deposit type allows its receipt type.
Note
The Ctrl and Shift selection features are available in the Find dialog box so you can select multiple receipt types. If you use this method to enter receipt types, ActivityHD automatically separates your selections by commas.
Press F2 to open a dialog box where you can add and remove selections for this field.
Press F3 to look up the item.
One Receipt per Deposit
If this checkbox is marked, indicates that deposits of this type only contain one receipt per deposit.
Example
Suppose you are creating a deposit type for a credit card machine. Each "batch out" of a credit card machine generates a single deposit at the bank. Mark the One Receipt per Deposit checkbox so that you can create a separate receipt for each "batch out". This allows you to record the batch number in the receipt reference. This means you can have multiple "batch outs" from the same credit card machine on the same day. Creating a separate deposit for each receipt facilitates bank reconciliation.
Custom tab
This tab is visible if custom fields exist for the entity. At a minimum, if there are custom fields, a Fields subtab will be present. One or more additional categories of subtabs may also be visible.
Fields subtab
This tab prompts for values for any custom fields set up for entity records of this entity type. Respond to the prompts as appropriate.
References subtab
This tab is visible if other records reference the current record.
Reference
From the drop-down list, select the custom field to view references for. Reference custom fields have the following format: PackageName.EntityName.CustomFieldName.
Example
Suppose a custom field exists on PRCodes that references an ARCode. On the ARCode record, on the Custom > References subtab, you can view all the PRCodes which reference that ARCode.
Exchange Folder subtab
This tab is visible only if you set up a custom field with a data type of "Exchange Folder". The label on this tab is the name assigned to the custom field.
This tab shows the contents of the specified Exchange folder.
File subtab
This tab is visible only if you set up a custom field with a data type of "File". The label on the tab is the name assigned to the custom field.
This tab renders the contents of the specified file according to its file type.
Internet Address subtab
This tab is visible only if you set up a custom field with a data type of "Internet Address". The label on this tab is the name assigned to the custom field.
This tab shows the contents of the specified web page.
Network Folder subtab
This tab is visible only if you set up a custom field with a data type of "Network Folder". The label on this tab is the name assigned to the custom field.
This tab shows the contents of the specified network folder.
Deposits tab
The Deposits pane shows the Deposits HD view filtered to show all deposits of the selected deposit type.
Double-click a row in the pane to drill down to its record in the Deposit window.
The Attachments tab is visible if any record for a given entity has an attachment. If the Attachments tab is not visible, this implies that no record of the entity type has an attachment on it; however, once an attachment is added to any record of the entity type, the Attachments tab will become available.
Attachments
The list box shows the files which are attached to the current record. Highlight a file name to preview the file in the adjacent pane. Double-click a file name to open the file in its native editor.
Preview pane
If a file name is highlighted in the Attachments list box, this pane shows a preview of the file contents. Some file types cannot be previewed but can be double-clicked to open in their native editor.
Change Logs tab
This tab is visible if the user has "Change Logs" access to the associated data folder resource.
The Change Logs pane shows the Change Logs HD view filtered to show all change logs for the selected entity record.
Double-click a row in the pane to drill down to its record in the Change Log window.
Other tab
Memo tab
To include additional information about this record not collected elsewhere, enter it in this text box. This area supports common keyboard shortcuts such as Ctrl+C to copy and Ctrl+V to paste.
Timestamps tab
This tab shows the user who created this record and the date and time of creation as well as the user, date, and time of the latest modification to the record.
Developer tab
This tab is visible only when developer features are enabled.
Automation subtab
This subtab shows field names and values for the current data record. Use the information in the subtab to assist when creating automation objects such as bots and import files. The field names and field values can be copied from the text box and pasted directly into your code or application. To copy content from the text box, highlight the content to copy and press Ctrl+C or right-click your selection and select Copy from the context menu.
Export (XML | JSON) subtab
This subtab shows the XML syntax for exporting the selected data record. The syntax can be copied from the text box as an exemplar for creating your own automation objects for bots, import files, ActivWebAPI, etc. To copy content from the text box, highlight the content to copy and press Ctrl+C or right-click your selection and select Copy from the context menu.
Import (XML | JSON) subtab
This subtab allows you to select a file for import and shows the XML syntax for importing data records. Use the subtab to explore the XML syntax for importing data records. In particular, you can investigate the syntax which results when using Data.Import and ActivWebAPI data POST and DELETE routes.
Change Log (XML | JSON) subtab
This subtab is visible only when the Enable Change Logs option is marked in System Options or Company Options (depending on whether the feature applies at the system or the company level). This is the default setting when developer features are enabled.
This subtab allows you to investigate changes to the current data record. The syntax can be copied for use in bots, dashboards, ActivWebAPI, and other automation. To copy content from the text box, highlight the content to copy and press Ctrl+C or right-click your selection and select Copy from the context menu.
Select Statement (SQL) subtab
This subtab allows you to investigate the SQL select statement used to retrieve the current data record. The syntax can be copied as an exemplar for data sources and other automation. To copy content from the text box, highlight the content to copy and press Ctrl+C or right-click your selection and select Copy from the context menu.
 Create a deposit type
 . The New Deposit Type window opens.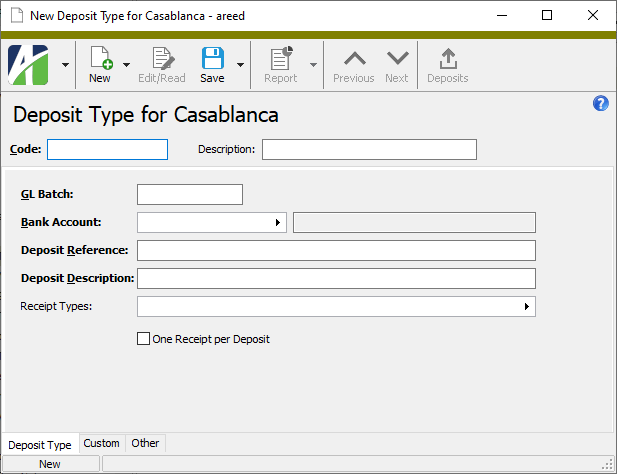
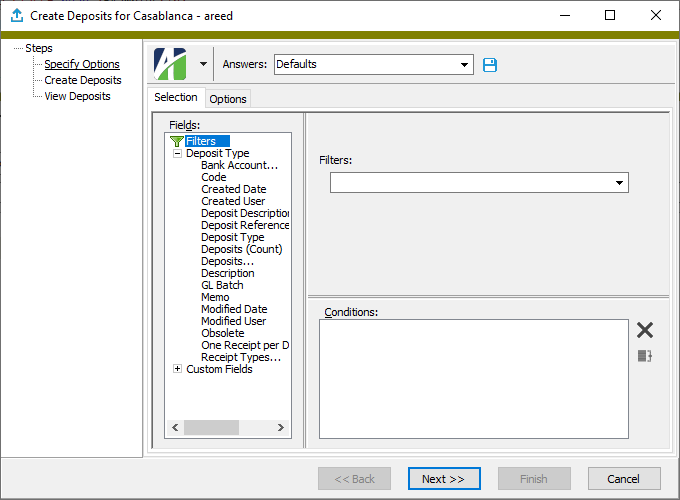
 .
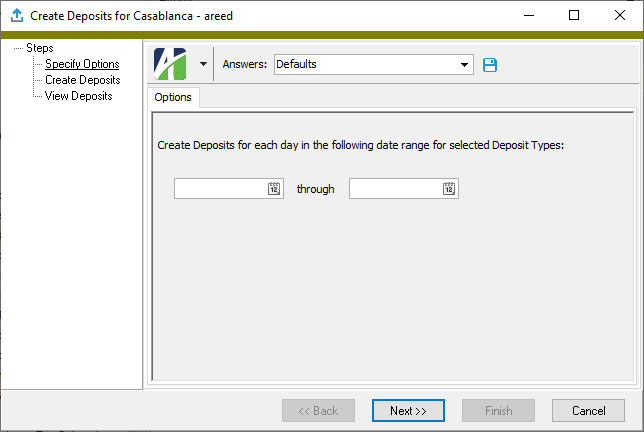
.
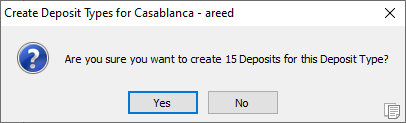
 .
.
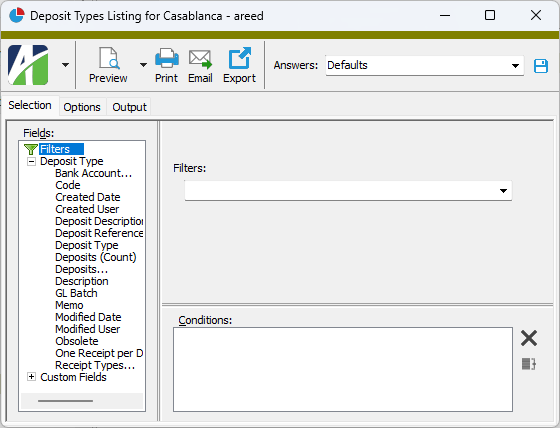
 - Provides access to two preview options.
 - Opens the Print dialog so that you can select and configure a printer and then print a paper copy of the report.
 - Opens the
  - Opens a drop-down menu with two export options: